Unlocking Nostalgia: How to Recreate Ernie’s Iconic Vintage Shirt from Sesame Street
Sew a vintage shirt for your puppet with a nod to Ernie’s classic bold stripes from the late 60’s and early 70’s. With the addition of the arm cuffs and waistband, this classic can be constructed using my t-shirt pattern. Follow this tutorial to make those additions.
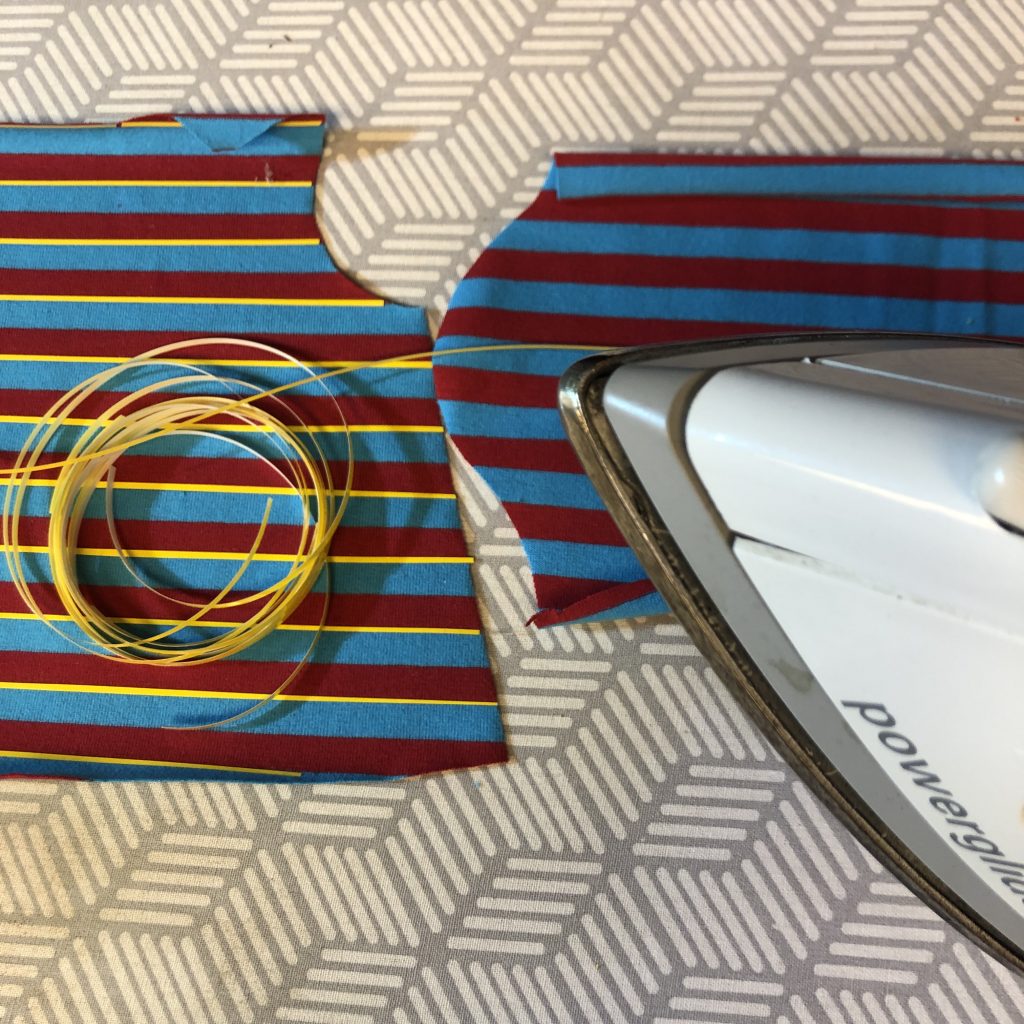
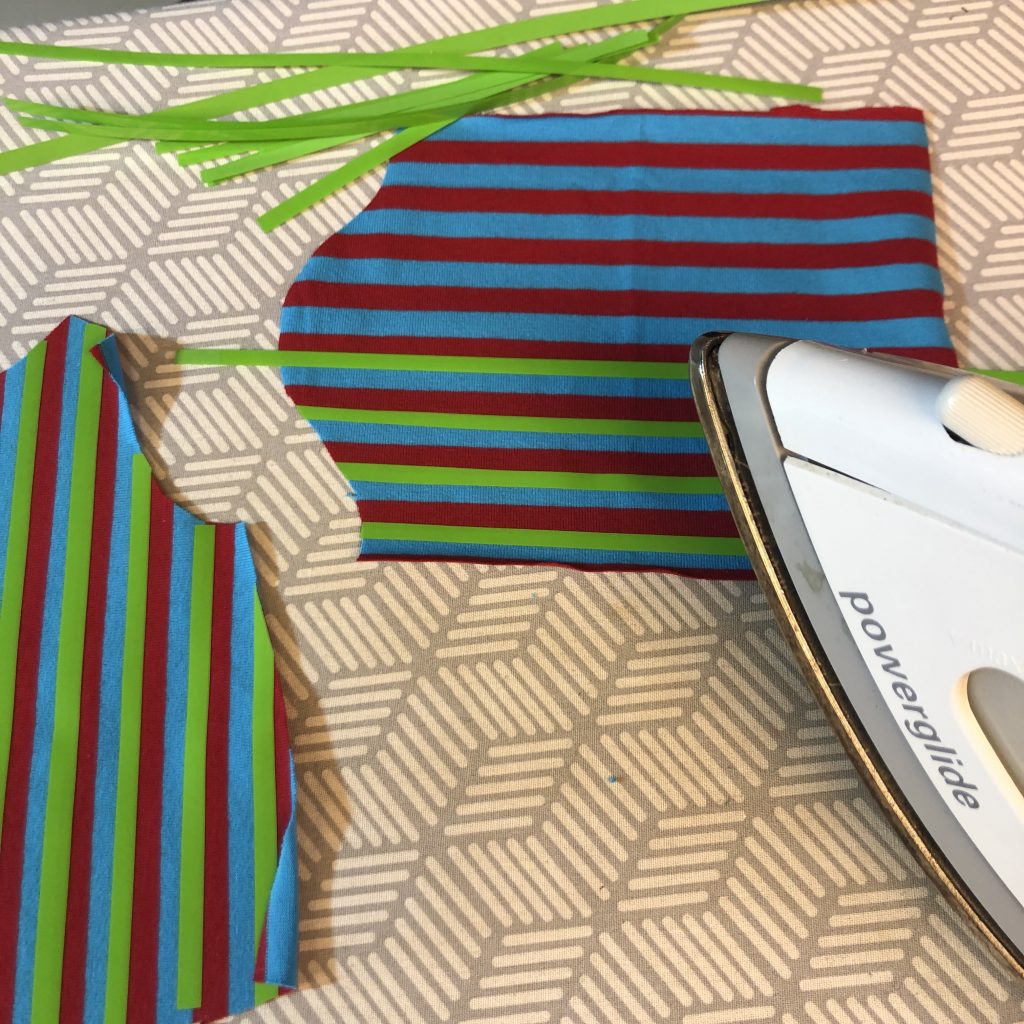
Finding the exact knit fabric with vintage pattern for Bert was hard, but I Googled “blue and red stripe knit fabric yardage” to find something close. The blue and red stripes are in both Bert’s shirt and Ernie’s, so I was able to use the same yardage to make both shirts with the addition of thin strips of Circuit Everyday Iron-on. Use a metal ruler or clear acrylic quilter’s guide to cut thin strips of iron-on with a craft knife or rotary cutter. Iron strips in place using the suggested manufacturer’s setting for your iron. Remove clear top paper. Use care when pressing the shirt after removing the top paper. I ironed only from the back side on a medium setting to avoid melting my little stripes. UPDATE: There are both Ernie and Bert fabrics on Spoonflower. David has kindly shared links in the comment section. That would save you time. Note: The Spoonflower scale prints are larger than my homemade version. It’s 2-3 times as large, so it may not translate as well on this small torso, but it would be great for a larger scale puppet like a live-hand puppet, and it would definitely save time.
I used yellow rib knit for the neckband, cuffs and waist band on the Ernie shirt. Cut a 2″ by 6″ rectangle for the neckband. Cut 2 rectangles measuring 1.5″ by 5.5″ for the wristbands. Cut the waist band 18″ by 1.5″. Some knits stretch more than others. Test these cut pieces out on the wrist and waist to see if they fit snug but not tight. My knit stretched A LOT, so if your cut piece doesn’t stretch enough, recut the pieces longer before sewing to shirt.
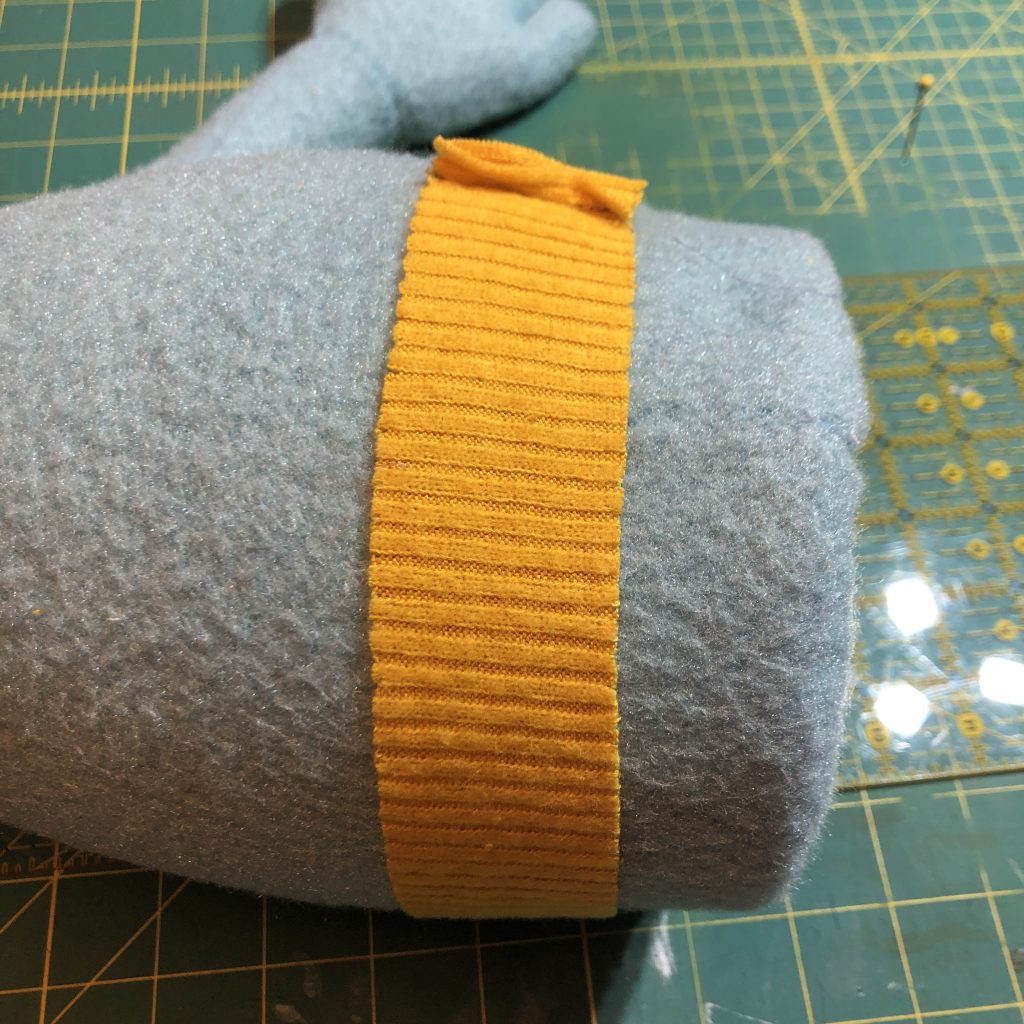
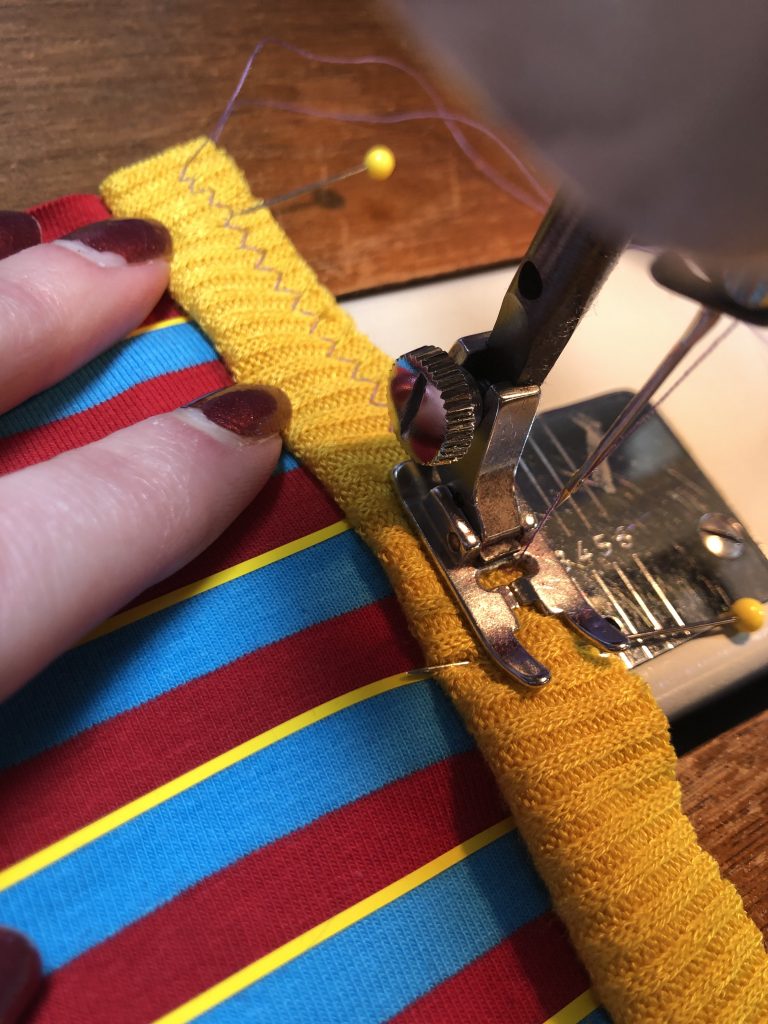
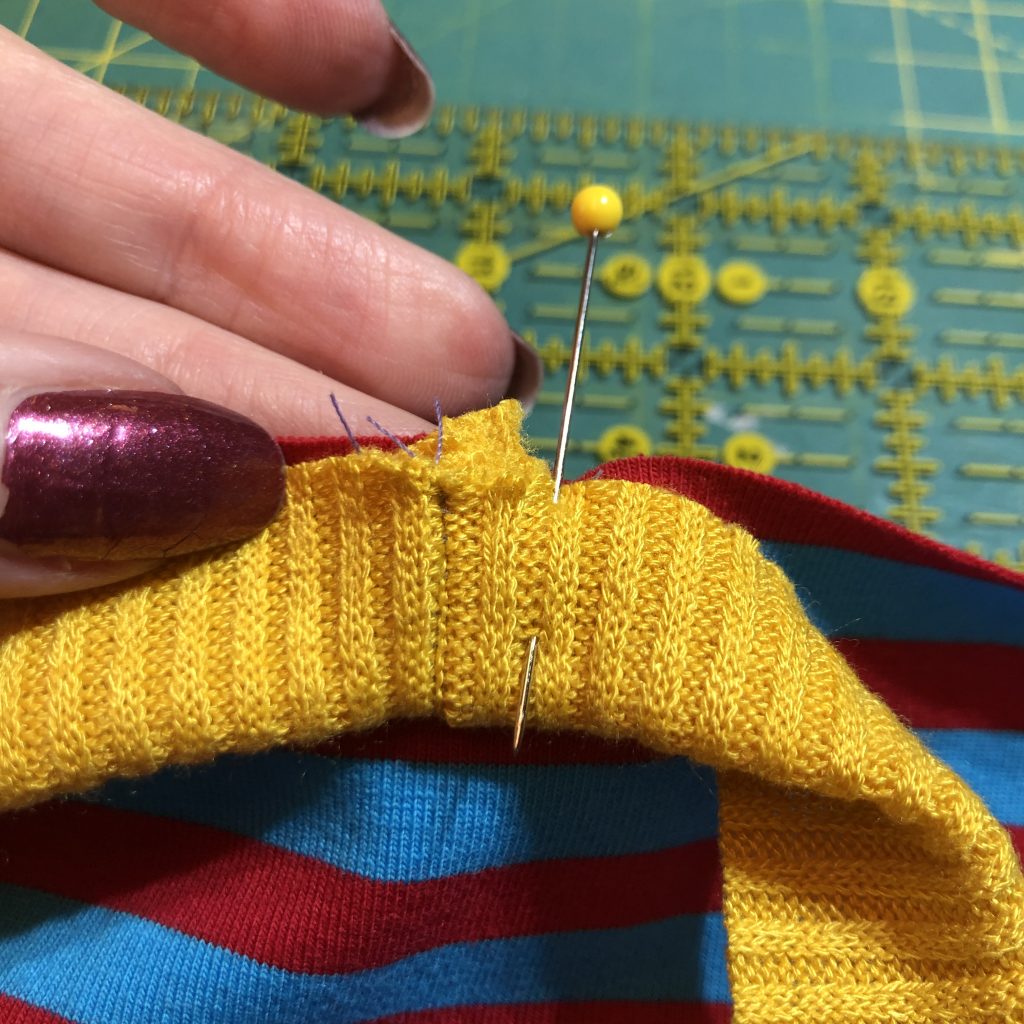
Sew the pattern according to instructions. First shoulder seams, then sleeves to shirt body. Add the sleeve cuffs prior to sewing the side seam. Since the pattern adds 1/2″ to the sleeve end for a hem, you’ll need to remove 1/2″ now before adding the yellow cuff. Pin the knit cuff folded in half WRONG sides together (revealing the right side to you), and pin with raw edges even with the raw edges of the shirt sleeve. Pin the outer edges first and then pin the middle distributing the stretch evenly across the knit band.
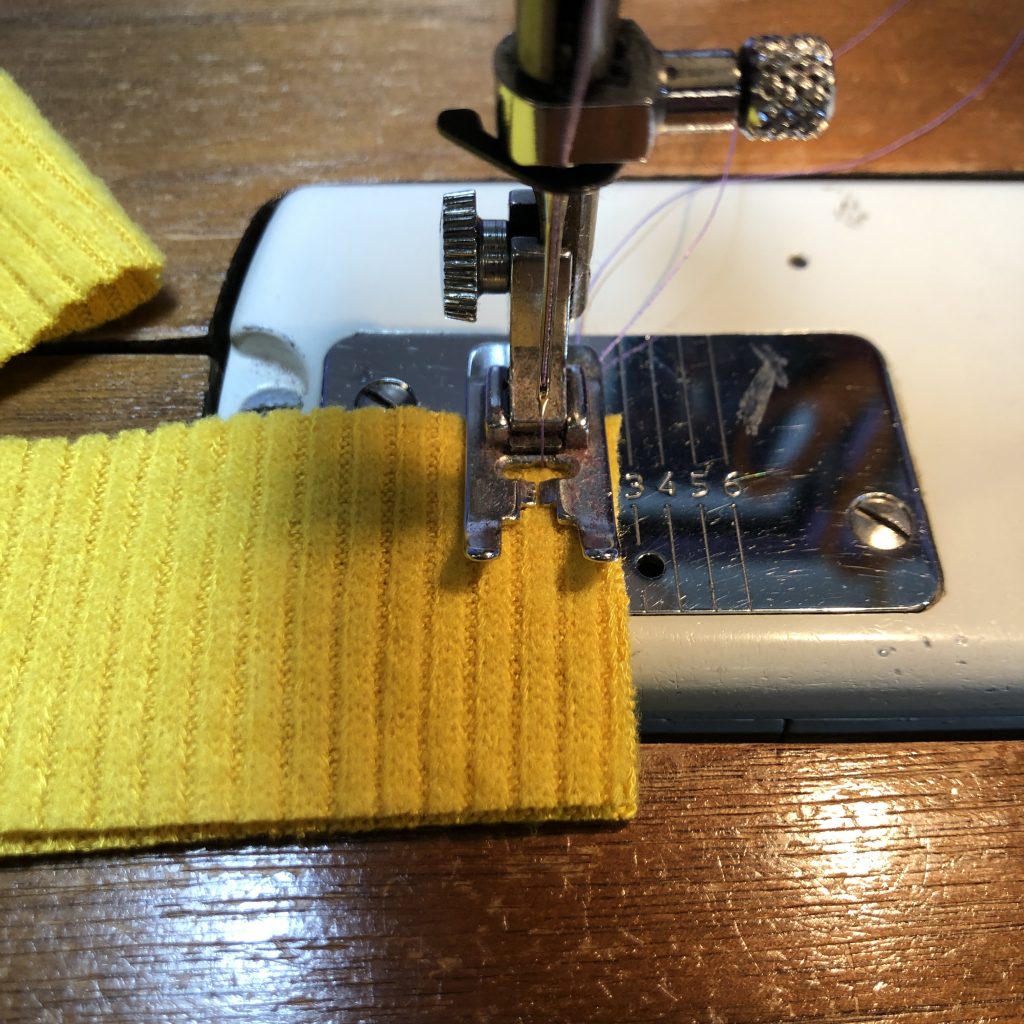
Sew using a zigzag stitch within the 1/4″ seam allowance. On my machine the zig zag dial is set to 3 (out of 4) and the stitch length was 3 (out of 4). See photo for the appearance. The zig zag allows for stretch. You’ll need that in order to get the large puppet hand through the sleeve end while dressing.
If you choose to press the cuff after sewing, turn cuff over and press from the wrong side (to protect iron-on), extending cuff so raw edges are turned inside.
You can now sew the side seam as directed in the pattern directions.
The neckband is added the same as in the directions.
The marking and pinning for the waistband is the same as the neckband in terms of marking and pinning and sewing. Mark center front and center back on shirt pieces on the bottom hem edge by folding the shirt in half matching side seams to find these center points.

Fold the yellow waist band in half, right sides together, and sew ends together using 1/4″ seam allowance to create a long loop.
If you haven’t already, test the fit of this waist band on your puppet to see if it has a “snug” but not “tight” fit. Adjust length if needed prior to sewing to shirt hem. Mark the waist hem band by folding in half. The opposite of your sewn seam will match with center front on the shirt body. Mark this. Fold this mark with the seam line to find the side points. Mark each side with a pen. These points with match with the side seams of your shirt.
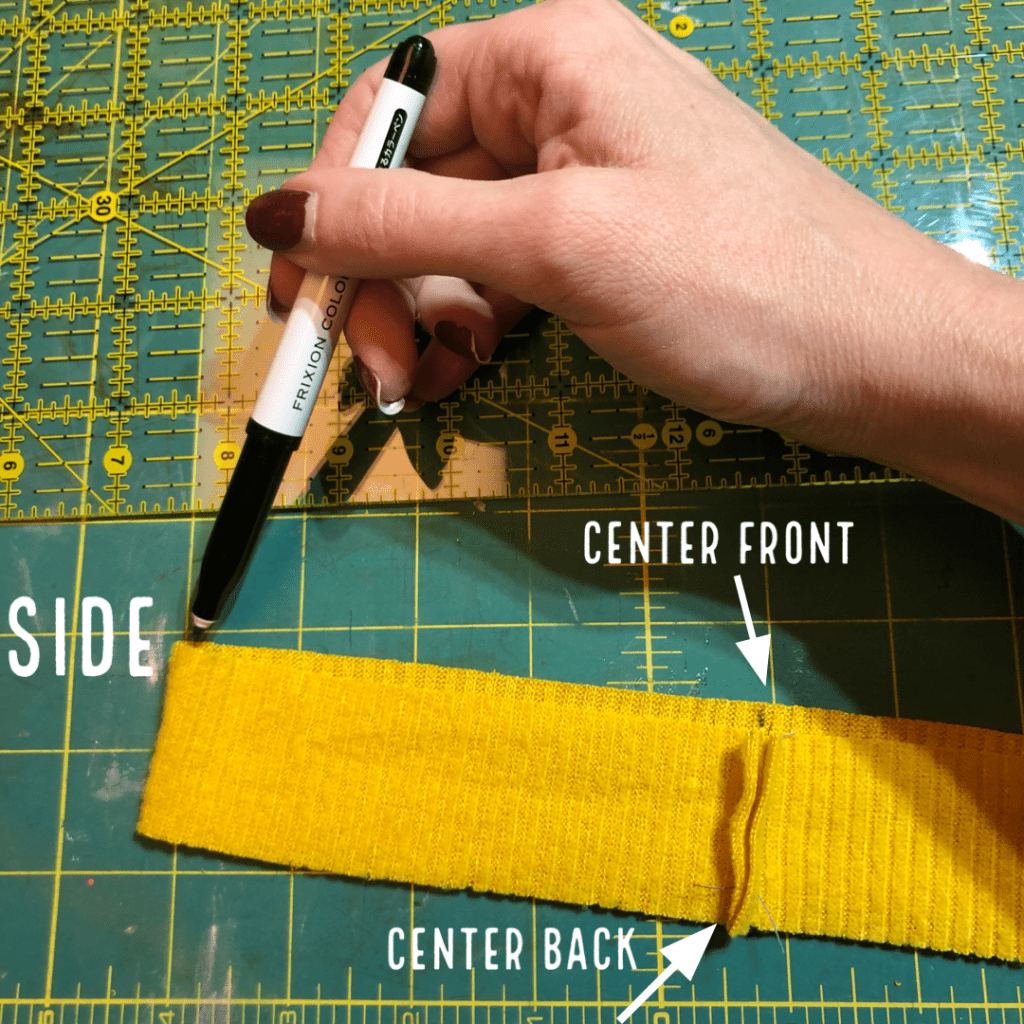
These marks will guide the pining of your waist band so the stretch is distributed evenly around the shirt. We call this “quartering” since there are 4 marks (center front, center back, 2 sides). It’s the same technique used for the neck band in the pattern. If this is a new idea for you, sew the waist band first and then the neckband since the waist band is bigger and therefore easier to manipulate once you get it over to the sewing machine.
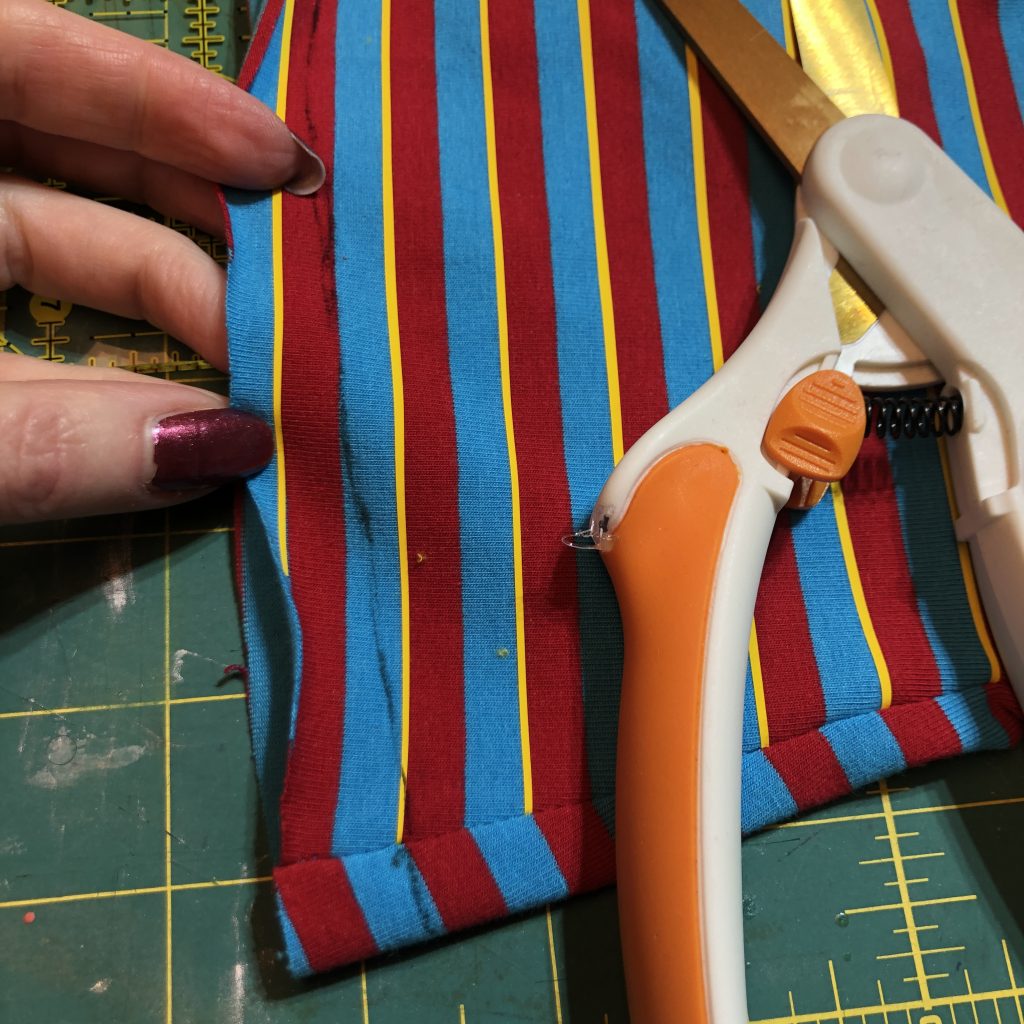
Before sewing waist band to shirt bottom, cut off 1/2″ from the shirt body bottom edge that was added for the original hem.
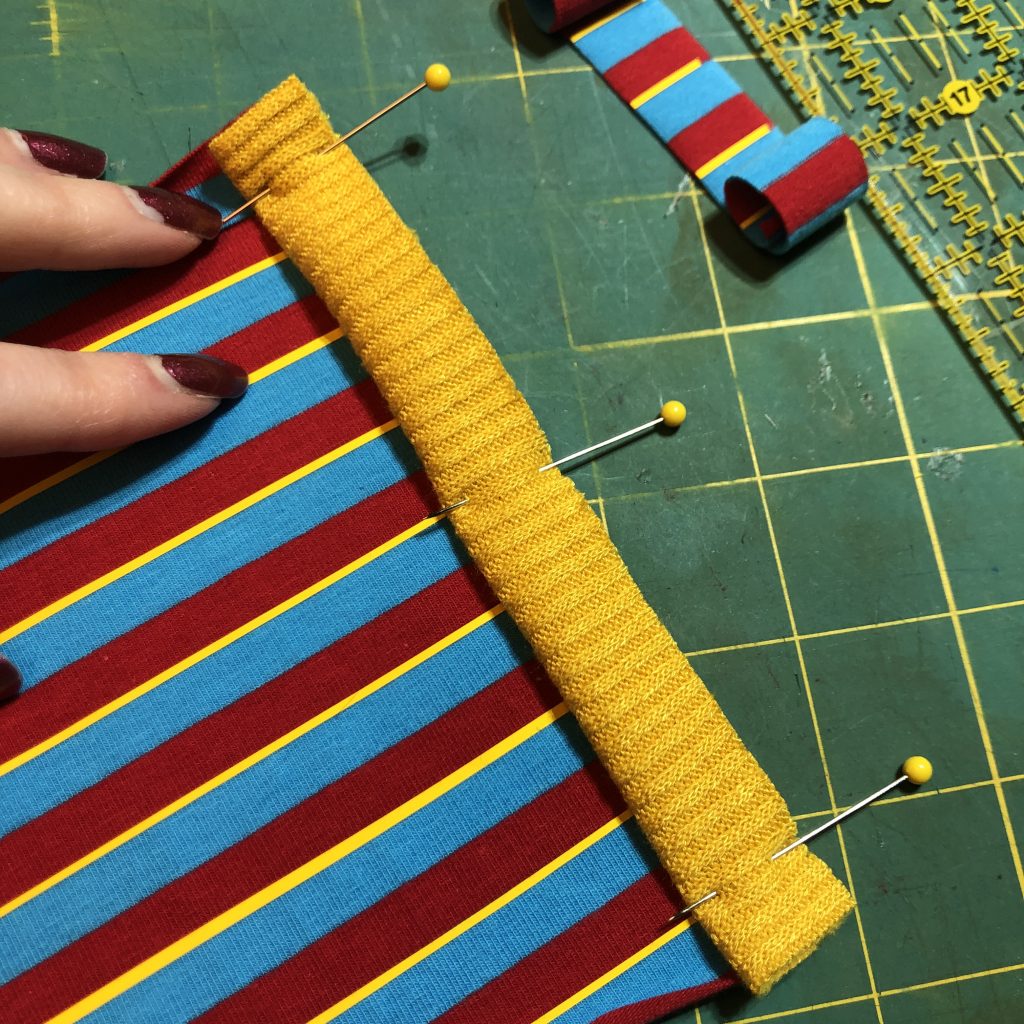
Fold the waist band in half WRONG sides together so the right side faces you. Pin the waist band seam you sewed with the center back mark on the back of your shirt. Face the raw edges of the waistband even with the raw edge of the shirt. Match the opposite mark (middle of band) with the center front mark on the front of the shirt. Match remaining marks with side seams on shirt.
The pinning will be the same for the neckband. Here is a picture of the final pinning of the neckband.
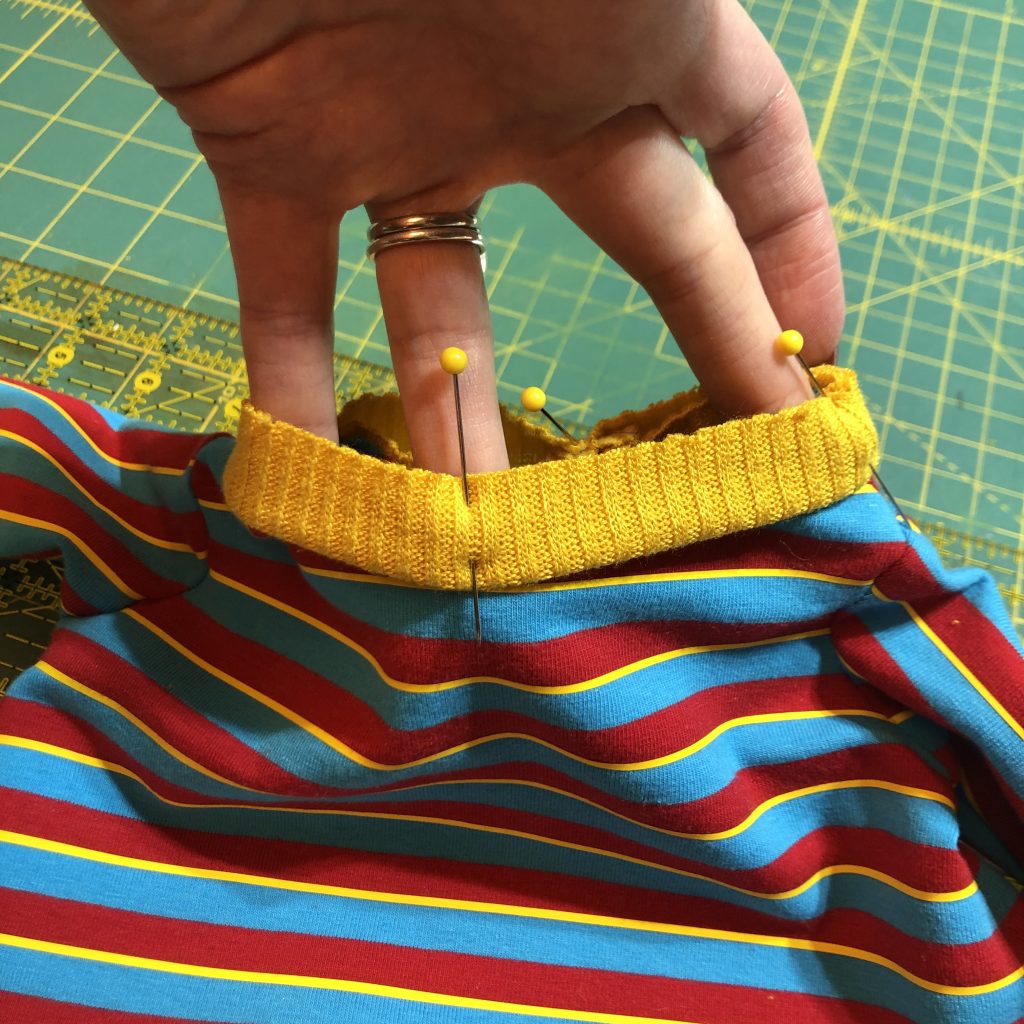
Sew both the neck band and waistband using a zigzag stitch within the 1/4″ seam allowance, similar to the wristband. Don’t stretch the fabric as you sew. Stretching as you sew may result in a stretched out appearance of the final edge.
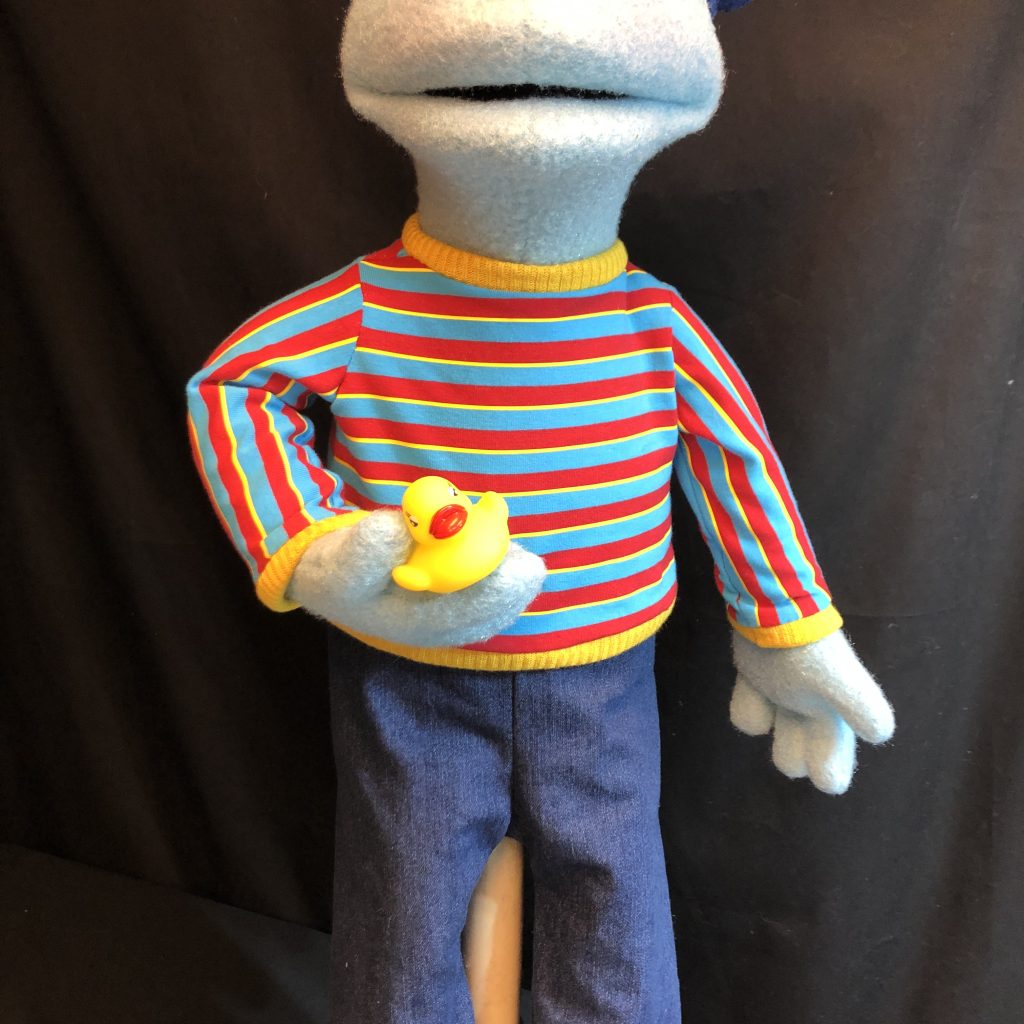
Once both the neck band and waist band are sewn, you are DONE! Time to dress your puppet. I prefer to make my costumed puppets with removable arms to assist the dressing process. I fold the torso in half to add the shirt to the puppet from the base up as opposed to over the big head.
Need pants now? Before the end of 2022, I plan to have my pants pattern available to buy! The pants you see above is the “Standing Pant” pattern. Looks great for stand up camera shots. I’ll also have a “mock pant” for those puppets without legs, and a “Seated pants” pattern for puppets who prefer to sit easily for live or camera performance.
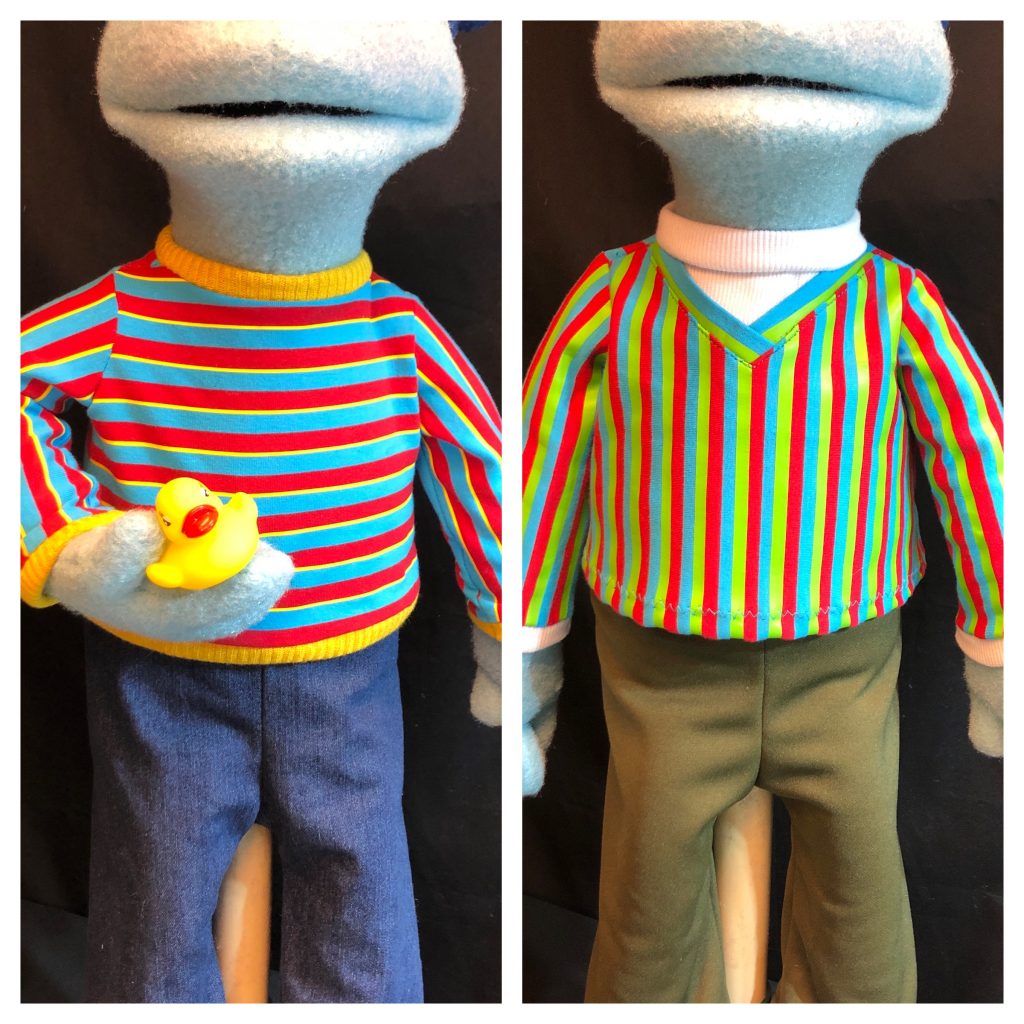
“What about BERT?!”, you say. Ok..Bert’s shirt is harder, but here are a few clues:
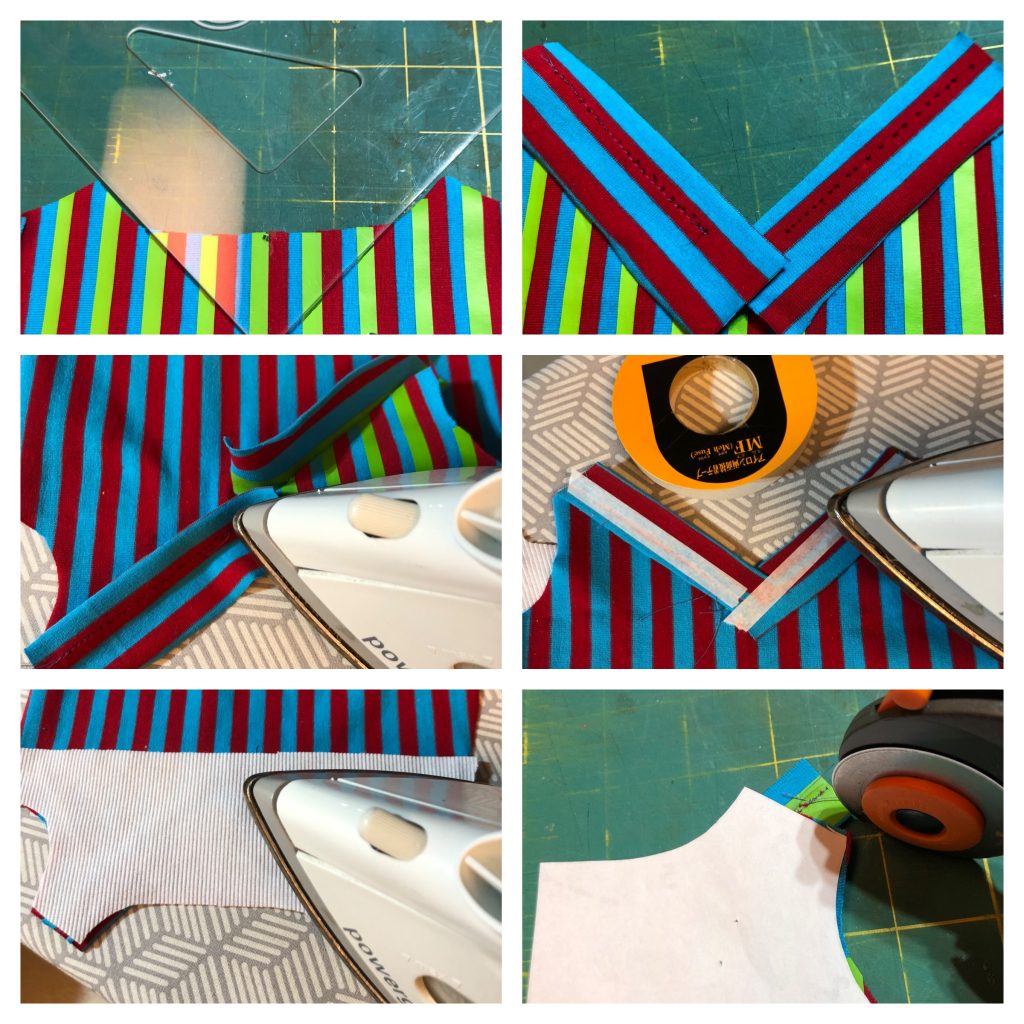
Basically I cut out a “V” in the front shirt piece and trimmed it out. I added a mock white panel with hem tape and then finished the shirt as usual using a white ribbed knit for collar and cuffs.
This t-shirt is designed to fit the Project Puppet Simple Series Alternate Torso pattern. You can find that here.