Which stitch is best for hiding seams? Which is best for adding strength? You can take your puppet build skills to the next level by knowing a variety of stitches and their uses. Here are my top 4 hand stitches, and when I use them.
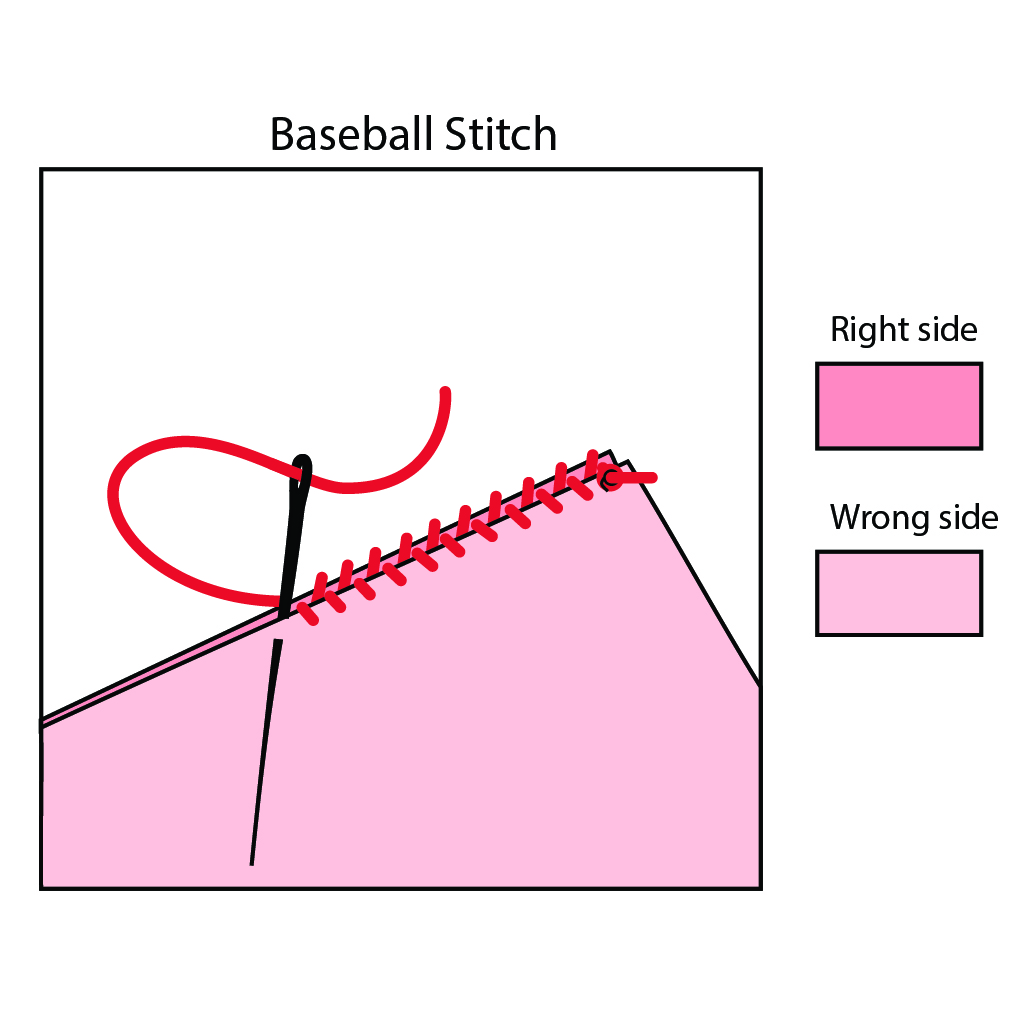
The Baseball Stitch is great for hiding fleece seams. It might even be the mythical Muppet stitch that builder’s often discuss. The puppet’s face seams on the front are the most important seams to hide in order for the audience not to notice them, so the baseball stitch is very handy there. As a general rule, I sew most fleece seams using the baseball stitch unless I machine sew them for better strength (puppet fingers perhaps) or because machine sewing is faster and the seam won’t be seen (like on the torso). To do the baseball stitch, place fleece fabric right sides together and push your needle through the wrong side of the sandwiched fabric from the side facing you and pull the needle out the back. The first and last stitches are the only ones entered from the wrong side so you can hide your knot. For the remaining stitches you will enter the fabric from the right side of the fleece and exit out the wrong side. You then enter the right side of the alternate fleece piece and out it’s wrong side. It will visually resemble the stitches on a baseball and the motion of the needle through the fabric is like a figure 8 as you weave and bop through alternating sides. Keep stitches about 1/8” (3mm) apart and 1/8” (3mm) from the seam edge.
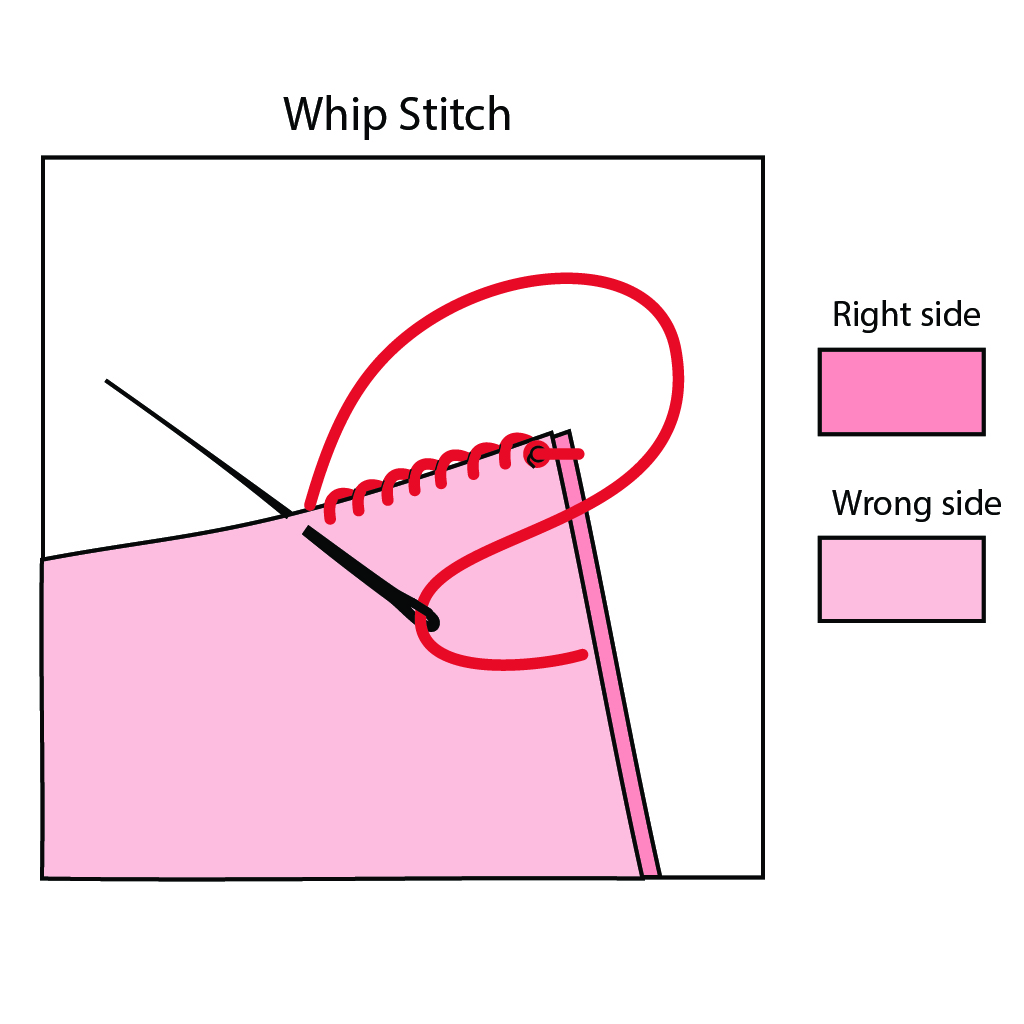
The Whip Stitch may be a little easier for some since it’s used more frequently in other applications outside of puppet building. It’s the basic stitch I use for sewing fur seams since seams are hidden naturally within the nap of the fur and the whipstitch can be done a little faster than the baseball stitch. Place fleece right sides together and push your needle through the wrong side of the sandwiched fabric from the side facing you and pull the needle out the back. Put your needle in about 1/8” away from your last stitch and push this through from front to back like the last stitch. Keep repeating. The stitches should be about 1/8” away from the seam edge. This is similar to the baseball stitch. In contrast to the more complex needle motion of the baseball stitch, the whip stitch threading looks more like the spine of a spiral notebook as rotates around in a spiral motion along the edge. If your seam needs extra strength, you can add a few “locks” now and then by doing a locking stitch (described on next page) every once in a while, say every four stitches. This includes areas which carry more weight or get extra strain with use. Seams like the neck should be sewn with the locking whip stitch exclusively for this reason.
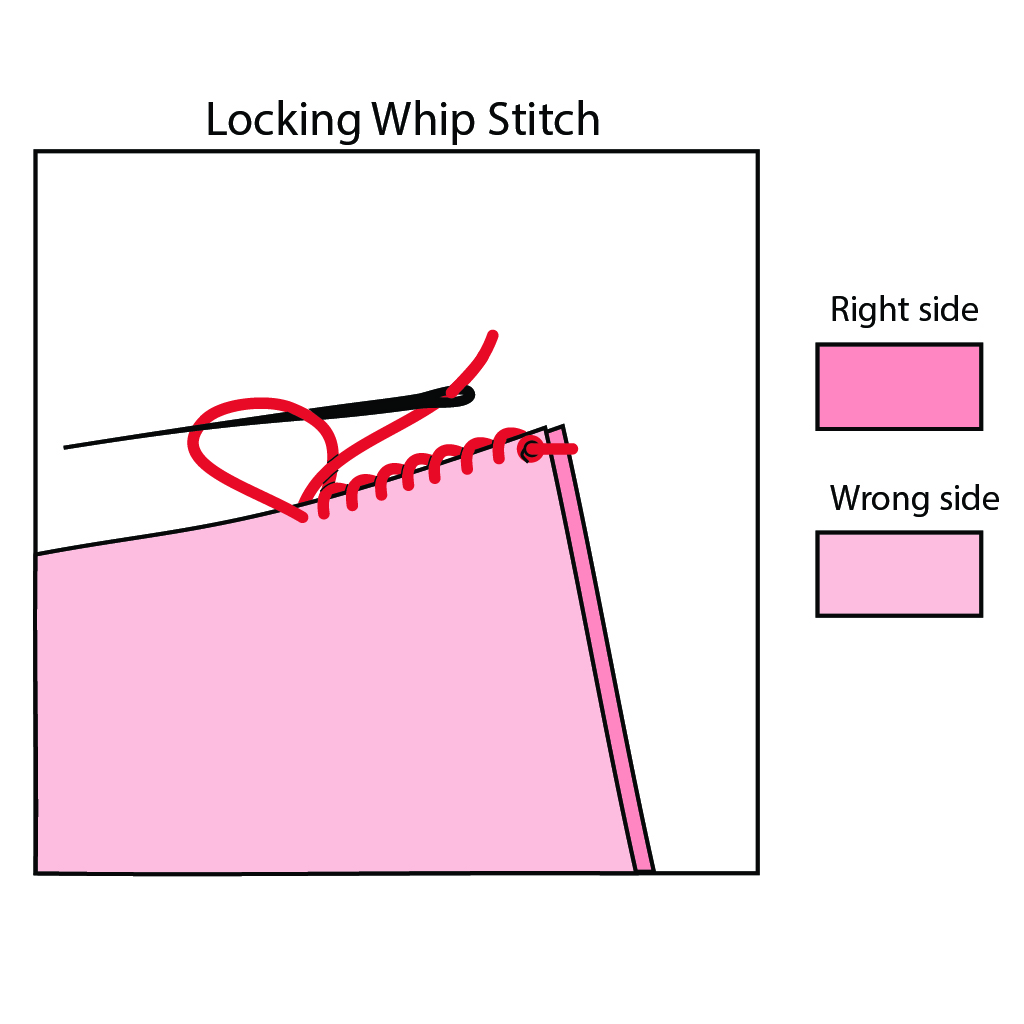
The Locking Whip Stitch is just like the whip stitch except that you lock each stitch to add extra strength. To lock your stitch, you pull the thread for your stitch incompletely leaving a loop where it failed to close fully. You thread your needle one or more times through the loop before pulling the stitch closed. This makes a little knot to keep the stitch tight. This stitch is great for the head to body join to add extra stretch on a join that gets pulled by the weight of the body over time. It’s also great for sewing the mouthsuede into the head fleece so your stitches are tight without any loose loops that might show up visibly in the mouth interior when the head is turned and glued in. You can tell the stitch is tight if you hear a little squeak as you tug or if you feel tension in the thread at the end of your pull. I used to HATE hand sewing with a passion when I was young. Now I love it. It’s relaxing, and I can do it fast and without much thought. This comes with practice.
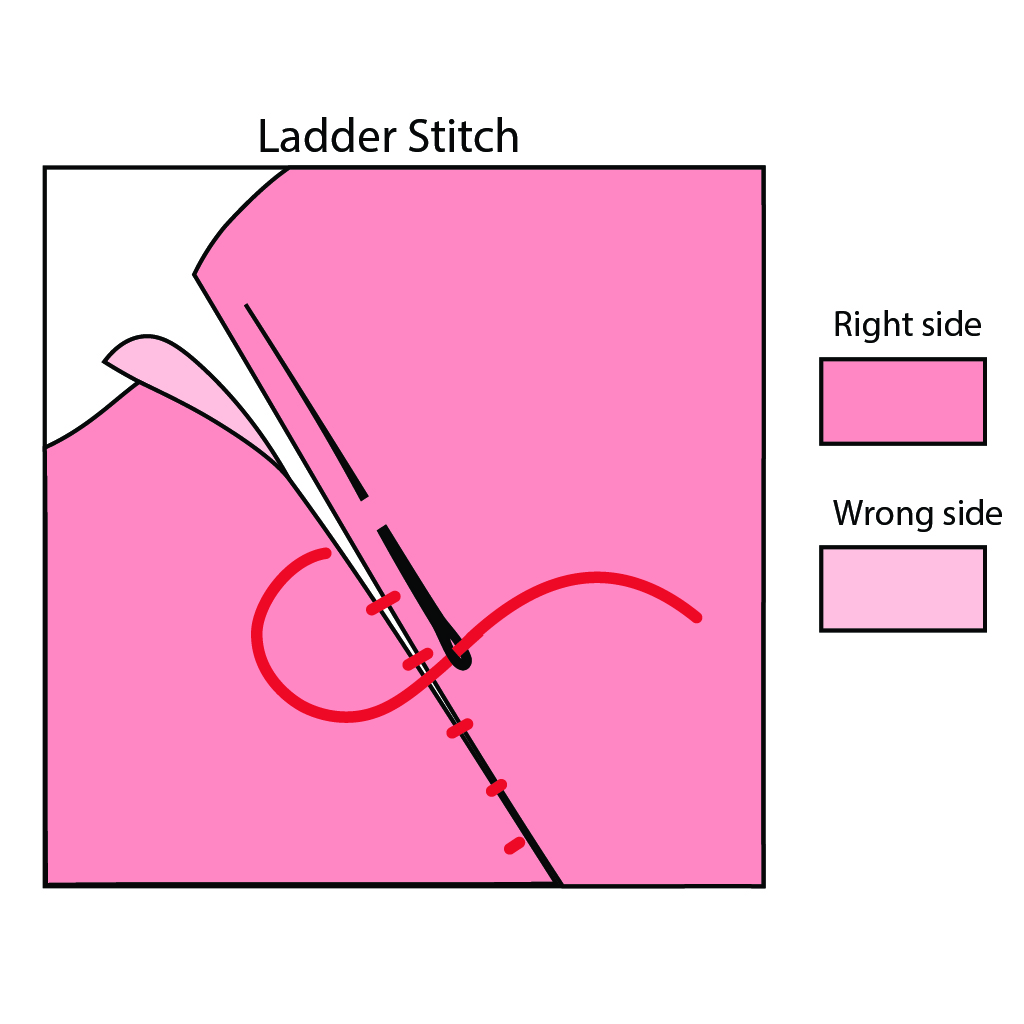
The Ladder Stitch is another seam hiding stitch for fleece or fur, but is a stand out among the other stitches because it’s done from the right side like the baseball stitch, but can be used in circumstances when you can’t access the back and sew with right sides together. This is perfect for sewing up the final seam on the center back of the head or torso after fitting the foam inside and you are left with a gap to close. It can also be used to close up the gap on a freshly stuffed limb. You can sew the fur wigging on a humanoid puppet or in the case of this pattern, the little chin goatee on the dragon. I also sewed the eye bags under the old ice dragon’s eyes using the ladder stitch before popping the eye domes on. It cleverly curls the raw edge under as you sew. Pull your needle up from the wrong side to hide your knot back there. Then you work from the right side exclusively. Take a tiny stitch from one side and then another stitch on the other side, each stitch close to the seam edge (roughly 3mm or 1/8”). The stitches are alternated back and forth between sides making the thread look like rungs on a ladder. After about 4-5 stitches, pull the thread taut to close up the seam. It’s fun to watch the gap disappear like magic. Do a locking whipstitch at the end of your seam to finish.
Is there another stitch you like? Perhaps a running stitch to gather? Let me know in the comments below.