Organize Like a Pro: Ultimate Guide to Pattern Storage and Project Bins
Wrangling Mysterious Pattern Pieces
Ever find a random paper on the floor and wonder if it’s important? Is this a pattern piece? Should I throw it away? Keep it? What pattern does it go to? Eek! This has happened to me more than I care to admit. In fact, I recently revamped my flat file drawers because they would not close properly. This was my cue to clean out and reorganize before the drawer jams. Despite having a good storage system already, some of my older patterns had multiple revisions that were not properly labeled, so I didn’t know which pattern for the head foam was the “good” one.
Creating a Habit of Labeling all Pattern Pieces
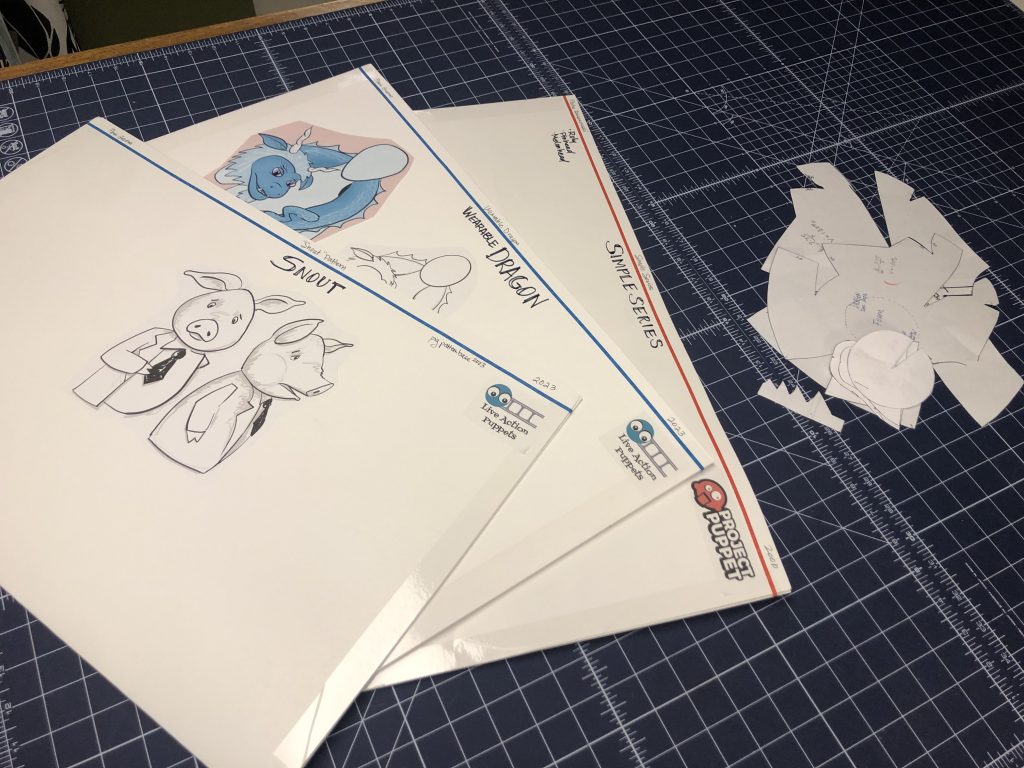
In the last decade I’ve made a habit of throwing out old revisions and only keeping the best version. If there are multiple usable good versions, then each pattern piece is labeled by character or pattern name along with any scale variations from the original pattern. For example “dragon upper mouth plate 80%”. All pattern pieces for any given character than land in a larger file folder which may have smaller manilla envelopes inside for variations within that pattern.
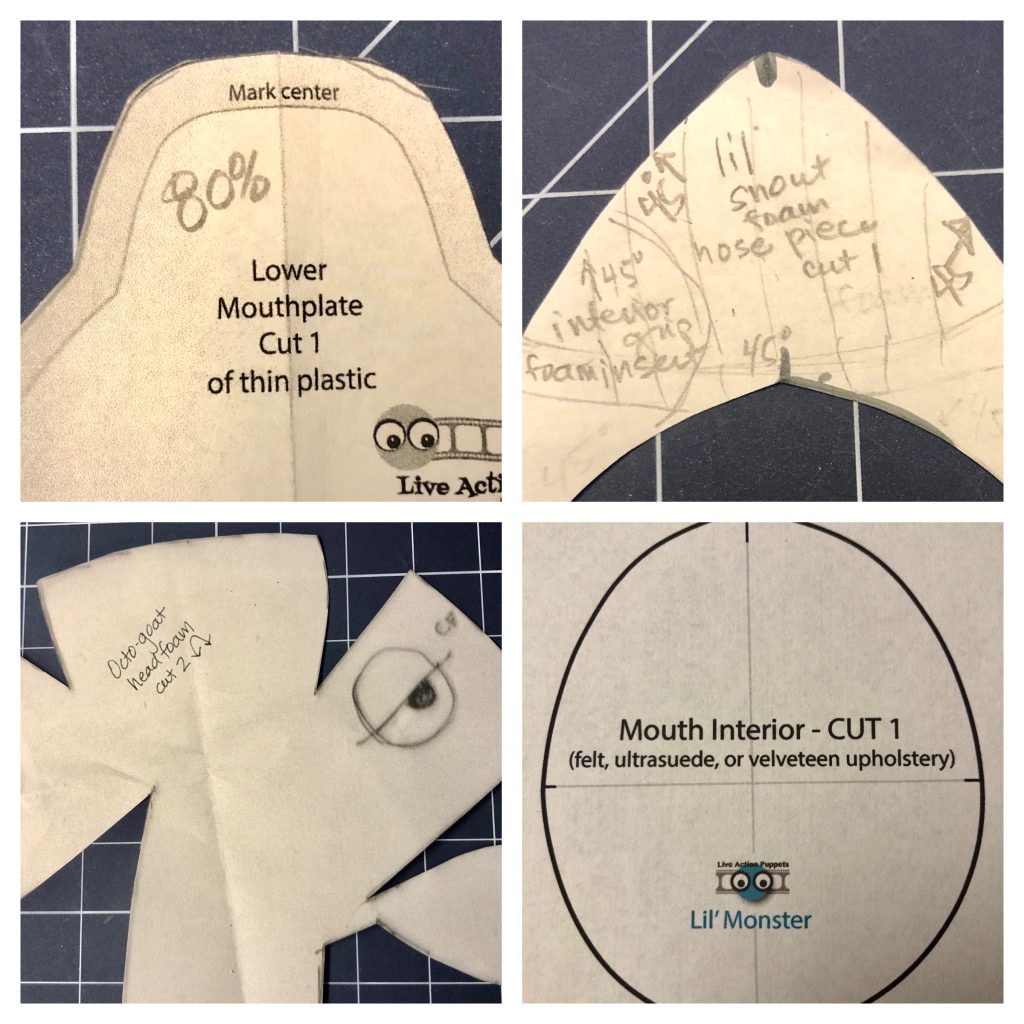
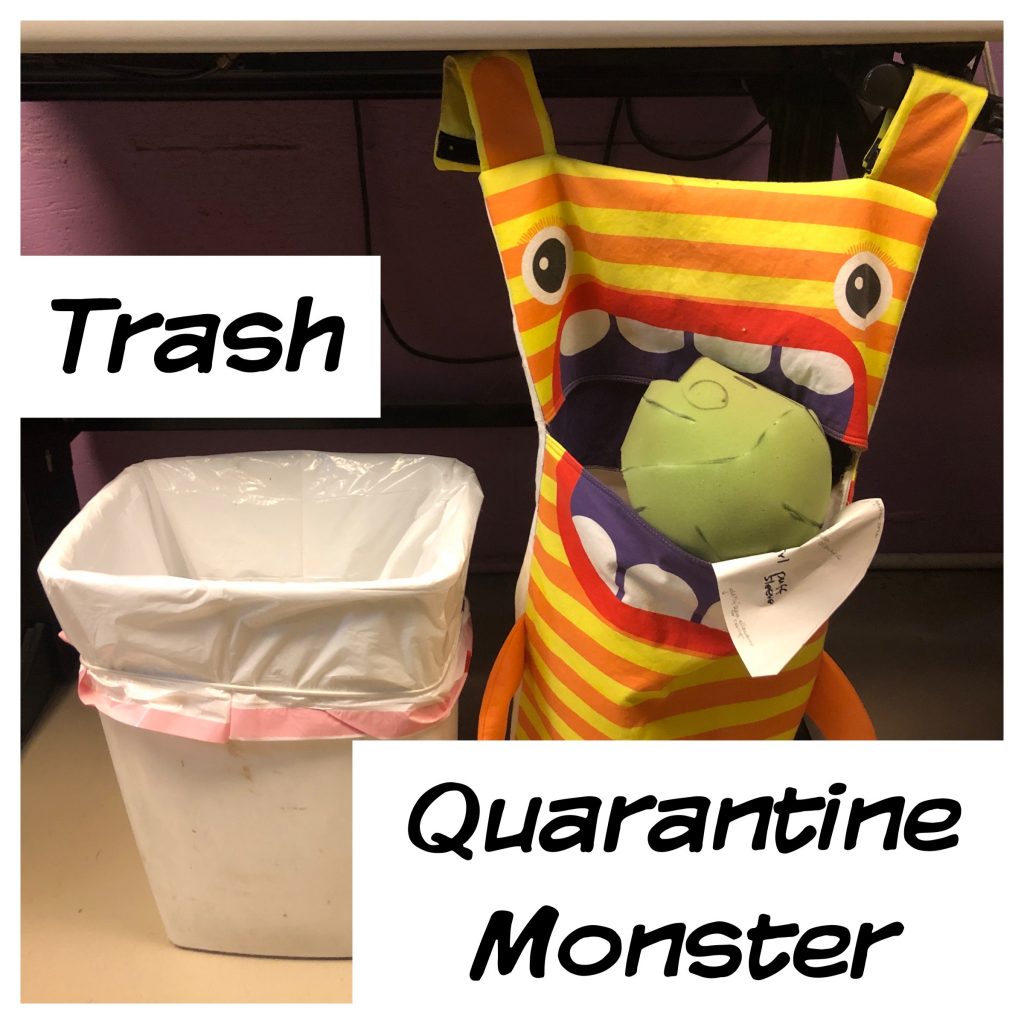
So…if you are developing a pattern, or modifying an existing pattern, label the pieces as you go. If it’s a revision of the pattern shape, label the first attempt, “Rev. 1”, and the revision of that first attempt “Rev. 2”. Increase the numbers sequentially so you can track the evolution of your pattern as you test it. In case you wonder how high my numbers have gone. I have a Rev. 36 head in my rafters. All pieces for that pattern have to have the revision number adjusted as you proceed even if some of the pieces aren’t amended. This will prevent confusion later as you toss out old pattern pieces. All fully rejected patterns and prototypes go in the trash. Any previous revisions I’m not sure about are labeled and go in a labeled project bin for that project or the quarantine monster until I land on the best solution.
File System for Patterns
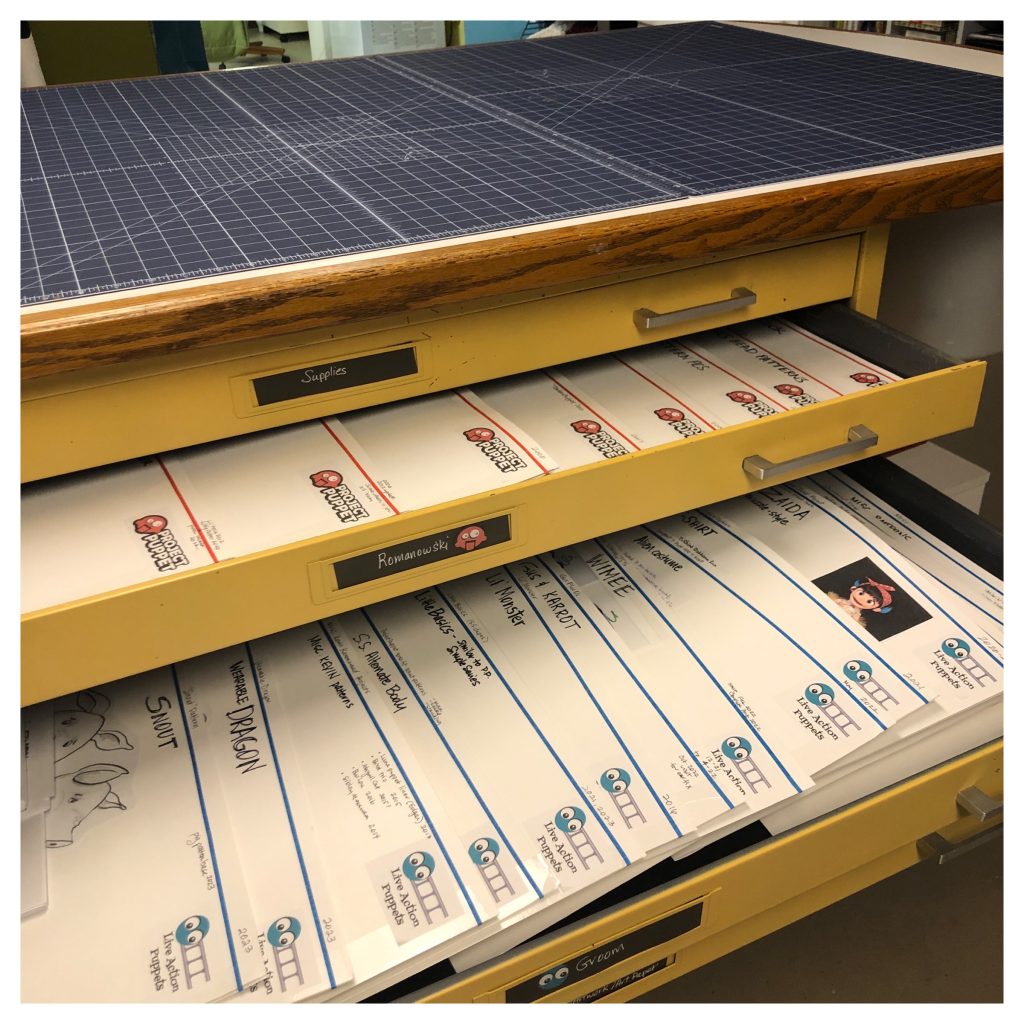
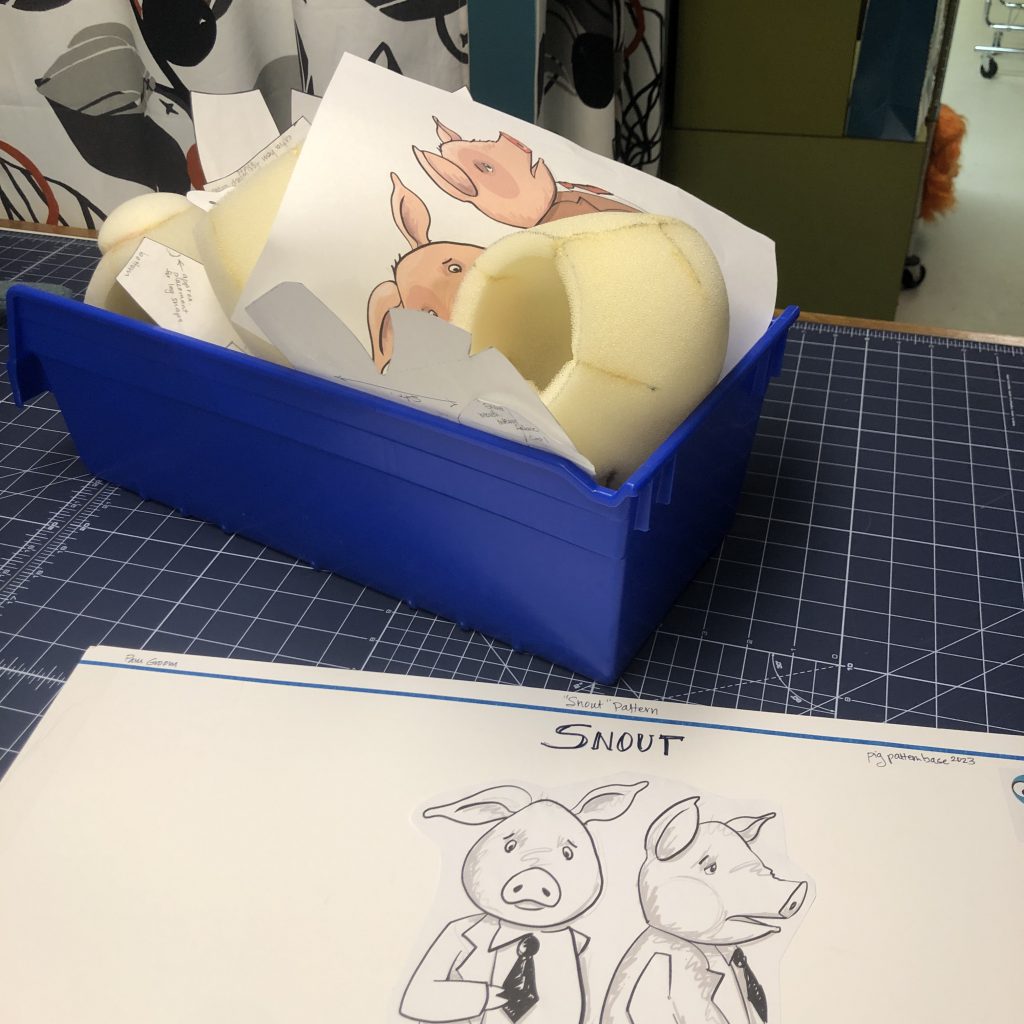
Once the patterns for a certain character are completed and I’ve cut out the materials, my paper pattern pieces need their own storage folder. This is partly because the project bin is overflowing at that point. I create a folder out of dollar store posterboard and label it with the author, name, date and any details that will help for later, such as the name and scale size of a torso pattern in another file folder that fits the head pattern in this file folder, or the client name.
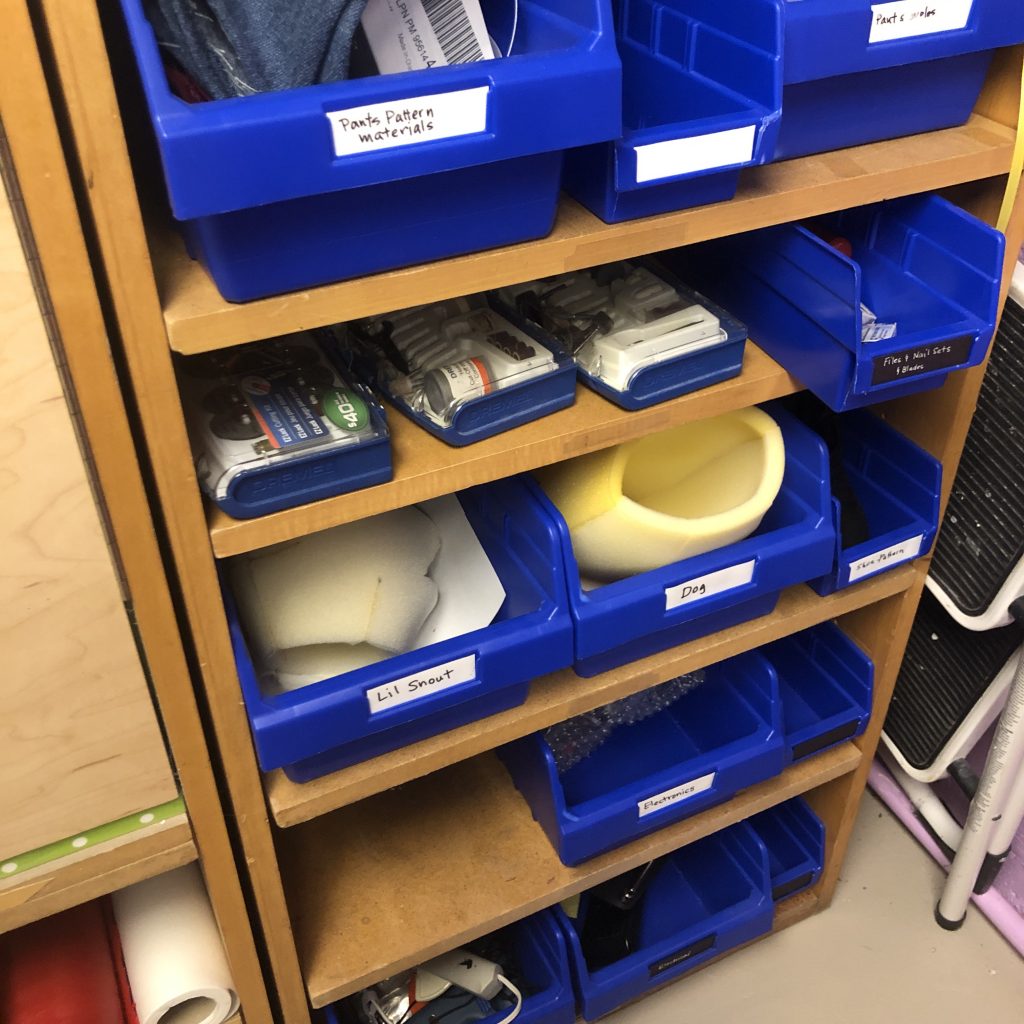
Bins for Each Puppet Project
The project bins are handy too. They help corral materials and pattern pieces so they don’t get mixed up. It also helps keep my work table cleaner. When I need to photograph something, I can move the bins to the project shelves and take pictures on a cleaner work table.

How to Make a Giant File Folder with Poster Board
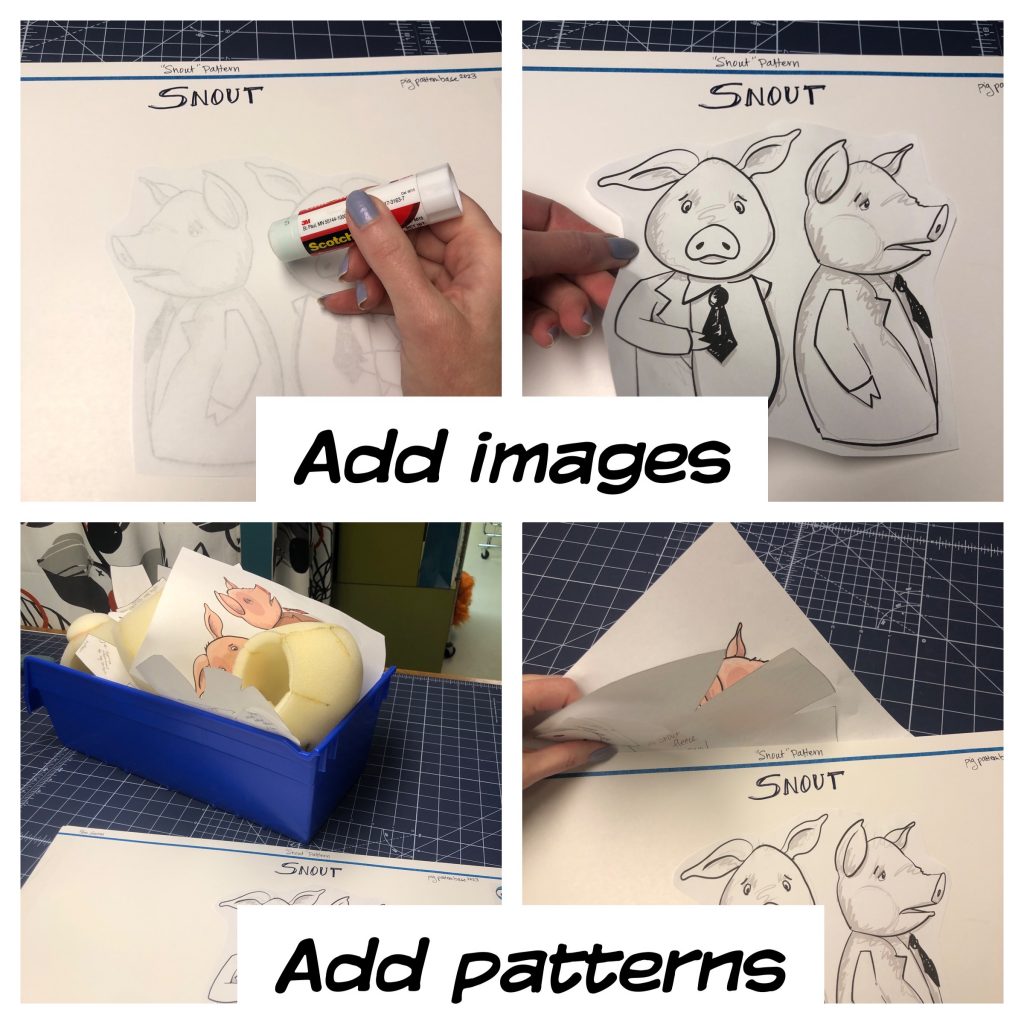
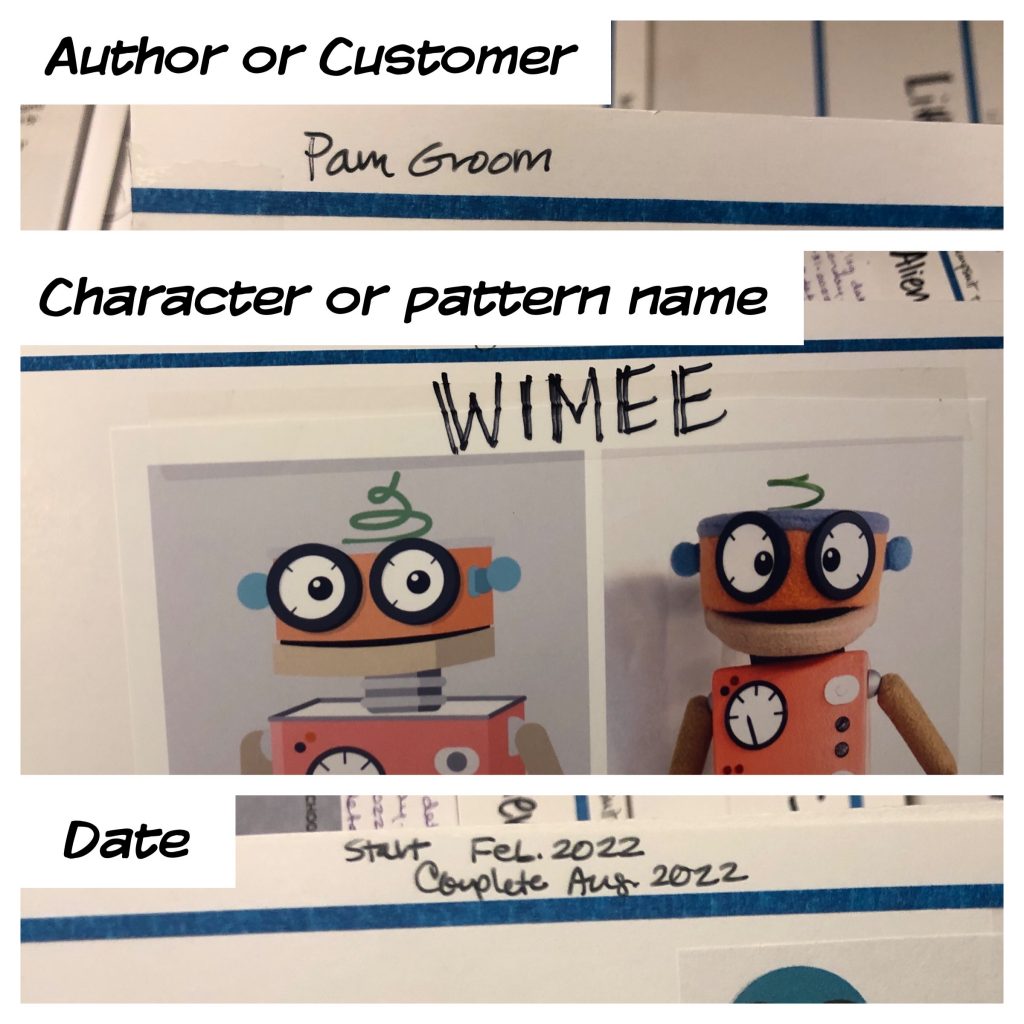
Puppet pattern file folders made from poster board are easy to make and hold up well over time. My poster board came from Dollar Tree (US) (28″ by 22″). Fold it in half to make it 14″ by 22″ and tape the sides using packing tape. I like to put a strip of colored tape or a thick Sharpie line along the top edge so I know which end is the open end. The marker or tape color designates pattern author. I label the envelope with the author or pattern source on the upper left, the pattern name in the upper middle and the date on the upper right. Images are helpful and adding the author’s logo is fun.

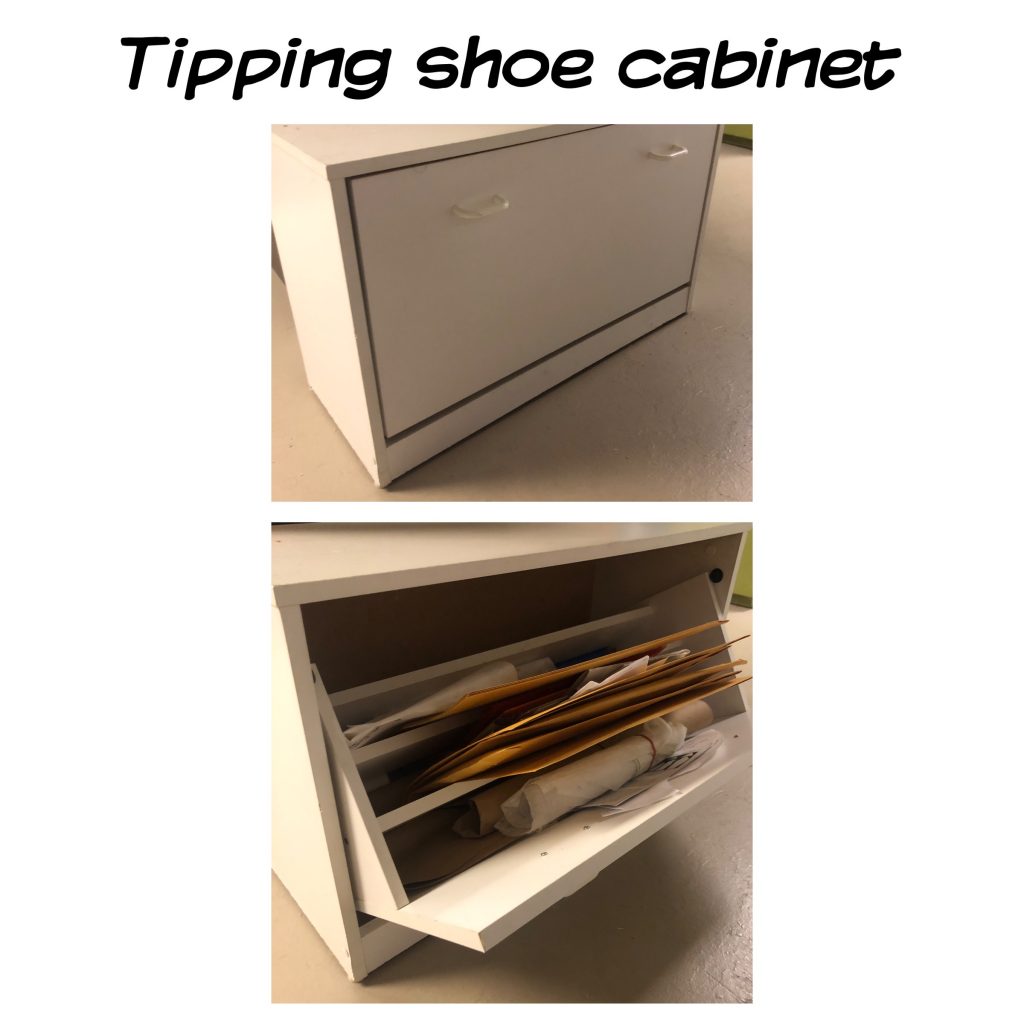
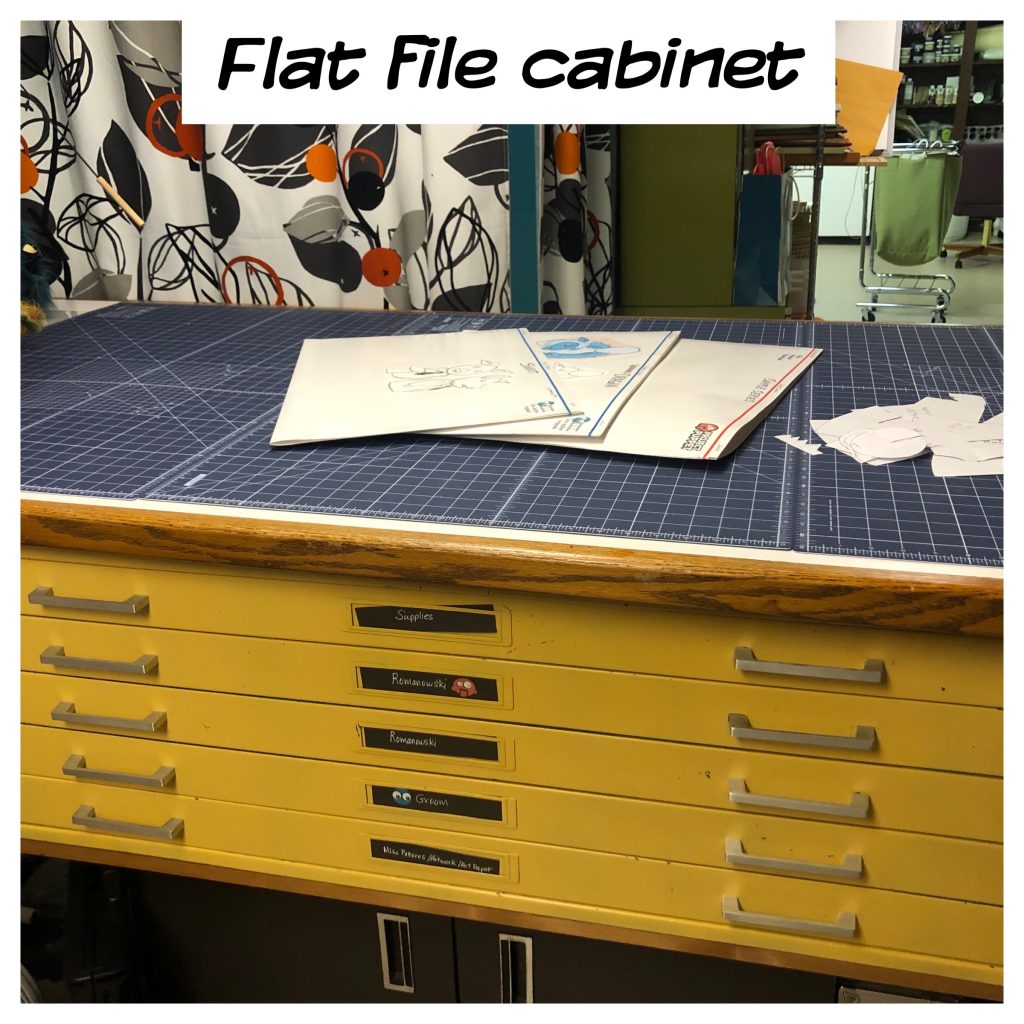
While I have a vintage flat file for my patterns now, those are hard to find cheap. My first pattern file was a tipping shoe cabinet that I reused from my side entry for the family’s shoes. I still use it for fashion and home decor patterns that I’ve drafted. It works great for puppet patterns as well. I just needed more space at one point and invested in a used flat file found on Craigslist. The same poster board folder will just barely fit the shoe cabinet. It may need to be trimmed on the top edge. What you see in that cabinet currently are 12″ by 15.5″ manilla folders on their side plus some random clipped and rubber banded patterns — didn’t reorganize this drawer yet;)
I hope an idea here inspires you. My shop has slowly evolved over time and my solutions have been guided by available resources, budget and needs, so if your budget or your needs differ, ask yourself what function you need to add to your work space to make it work better for you and what is available around you that will fill that need. There is always more than one solution. Ponder multiple ideas. You may come up with something clever! I’d love to hear what you do to stay organized and keep patterns and project from taking over your work space. Share in the comments below.