You Want My Wonky Eyes
Why 3D Print?
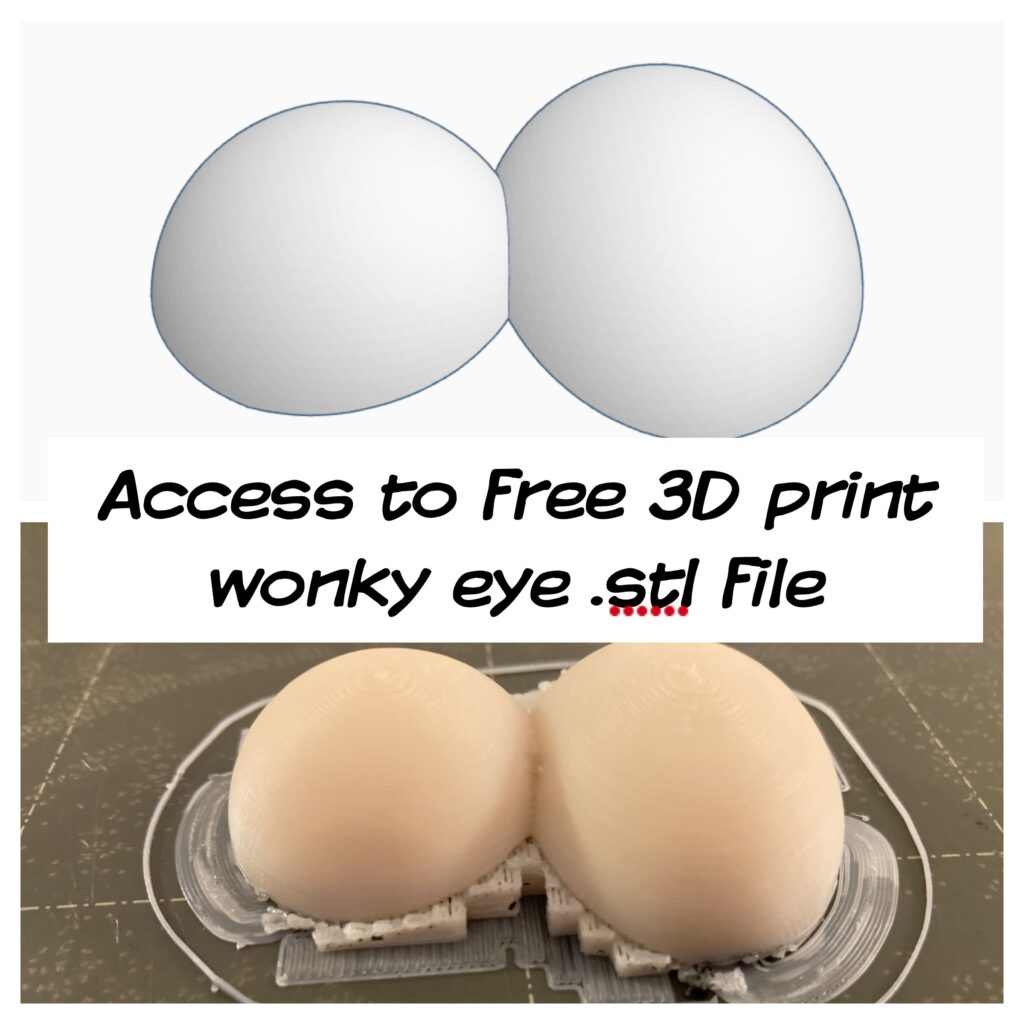
I love 3D printing puppet eyes. It gives me the option of designing and creating eyes that perfectly match my vision. The scale (size) can be designed to fit my puppet’s face. The “Wonky Eye” is an example of that. The face on the Lil’ Monster puppet is small. The number of small commercially available eyes is limited to simple teddy bear eyes. I used a unique toy eye that I liked as inspiration for the wonky conjoined eye you see here. I designed it in Tinkercad. Once designed, I can 3D print it and share the .stl file with others.
Nylon Bolt Attachment
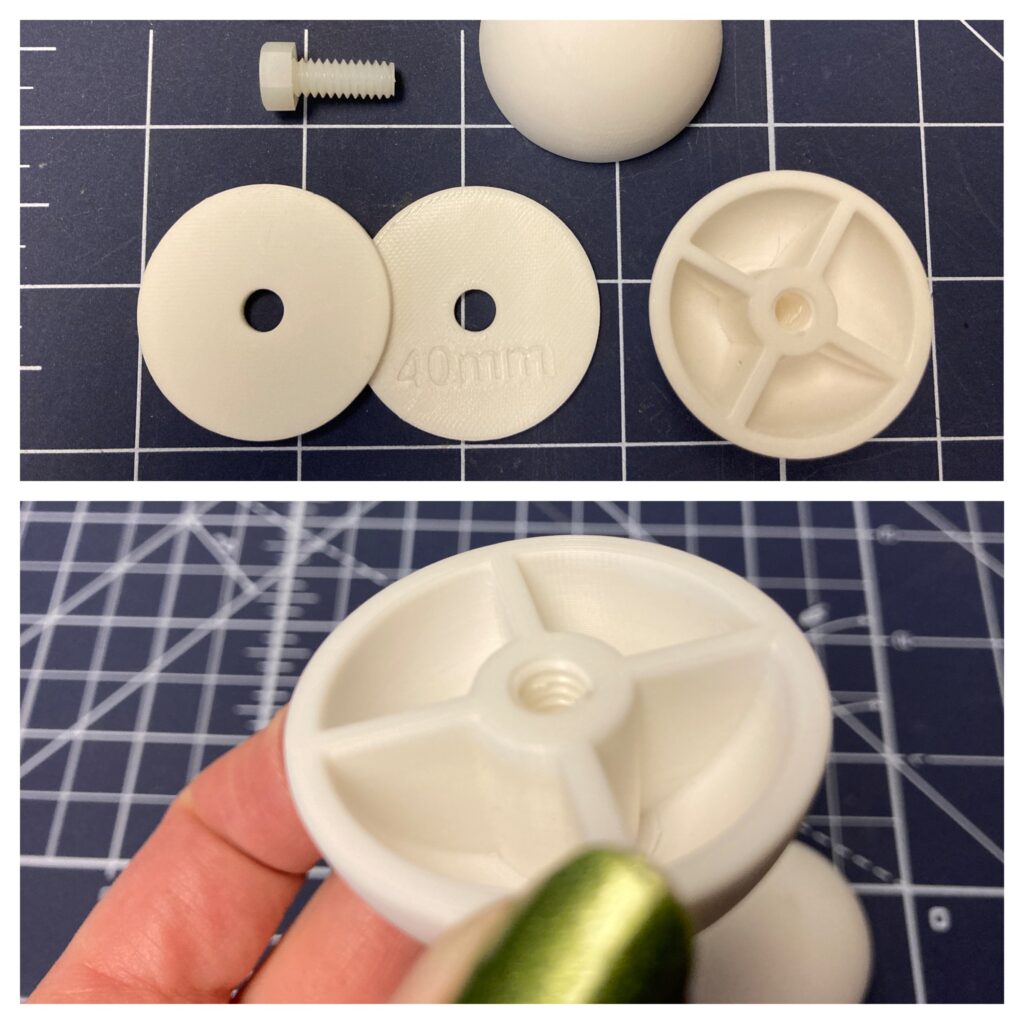
The original toy eye had to be hot glued to the puppet, so the 3D-printed version is an improvement. It can be secured with a nylon bolt. Nylon bolts remain securely attached without glue, yet allow for future removal. Nylon hardware is also lightweight compared to metal hardware used in resin-poured eyes. 3D-printed plastic eyes are lightweight compared to resin eyes, so the entire eye assembly is similar in weight to a safety eye but with easier removal.
If you are making puppets for children, then safety is more important. The safety eye is the best option for children when choking hazards are a concern. For professional puppets used by adult puppeteers, the nylon bolt is superior.
With the purchase the Lil’ Monster pattern, you get access to the .stl file for this wonky eye. This file allows you to 3D print the wonky eye at home. I’m writing this post to give you some tips for using the file effectively.
If you are not familiar with 3D printing, there are lots of resources online. They will cover the topic more thoroughly.
Filament Options
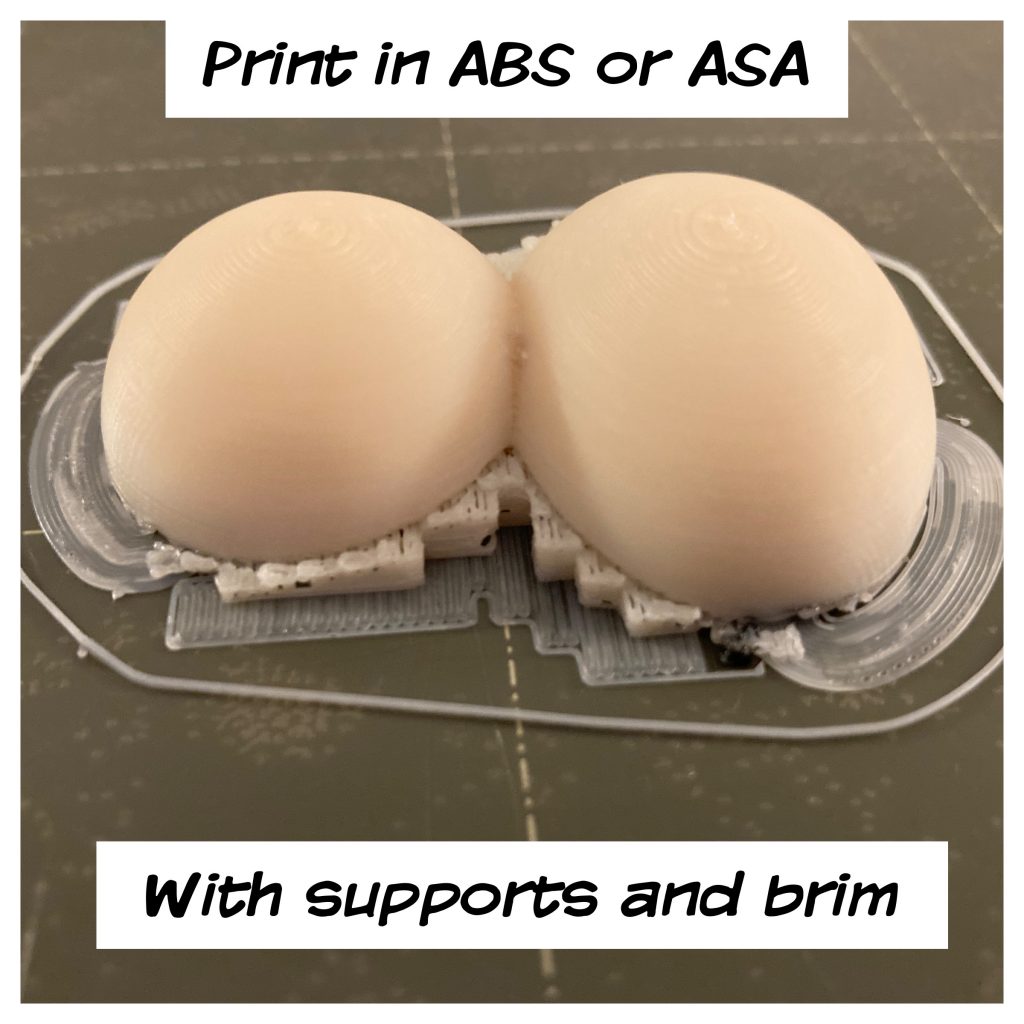
There are a variety of 3D filament types used to print, but my current favorite for features is ABS (or ASA). Some have asked about using PLA. You can use PLA, but it is harder to sand and less UV stable, so it can warp. Cosplay artists use 3D printing in their designs, so looking up finishing techniques can give you ideas on how to use PLA or ABS (ASA). Here is my favorite introductory video on the topic of 3D printing by KamuiCosplay:
https://www.youtube.com/watch?v=uT0nw_4p6mc
Making Your Own Wonky Eye Set
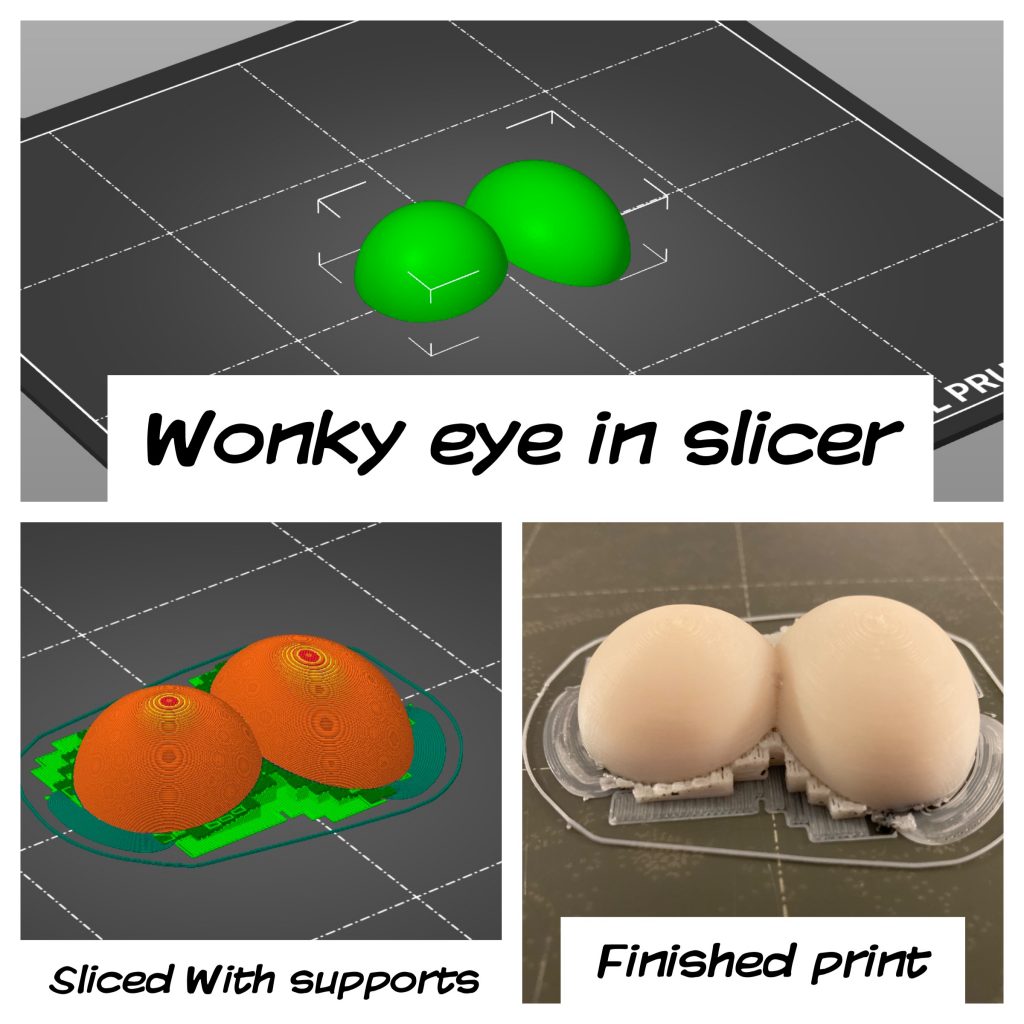
Once you purchase your pattern, you will find a link to the wonky eye .stl file in the pattern directions. If you own a 3D printer and have used it in the past, you will also have the slicer software needed to open this file. On my computer, clicking on a .stl file automatically opens my slicer software and the wonky eye shape appears on a virtual build plate.
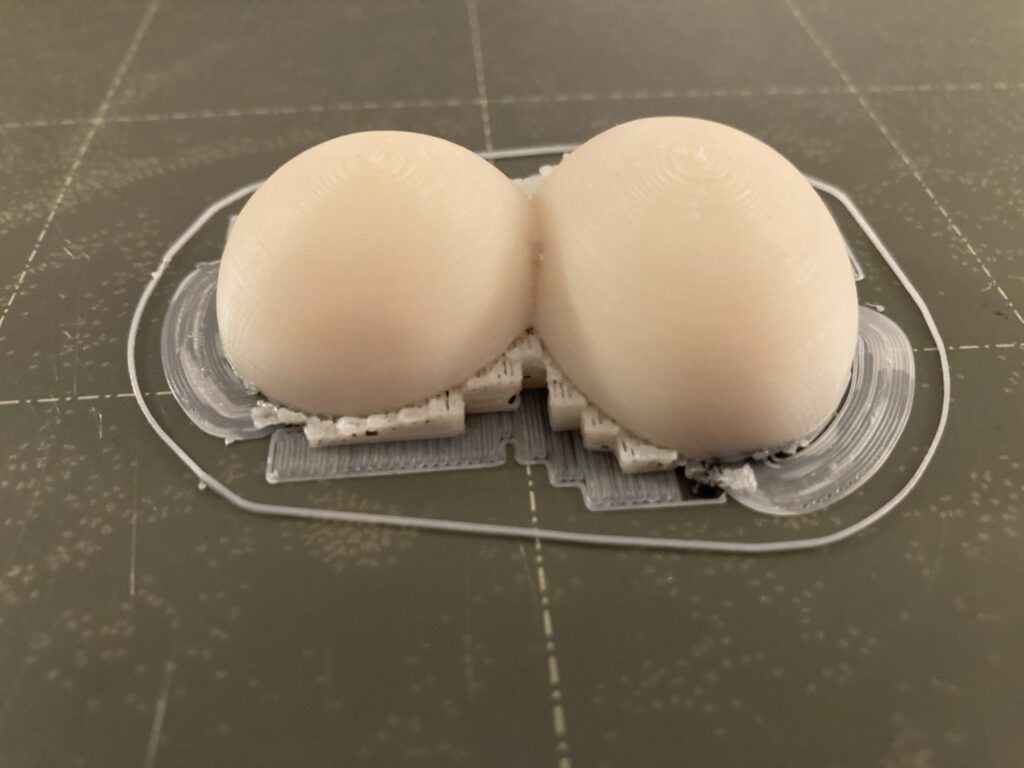
This particular eye is concave on the back to help it conform to the puppet head. Because of this you will need to print the eye with supports. Of the eyes I’ve designed in the past, this particular one is probably the messiest in terms of cleanup. That is because of the support material and small scale. Using the right tools will help you clean this print up.
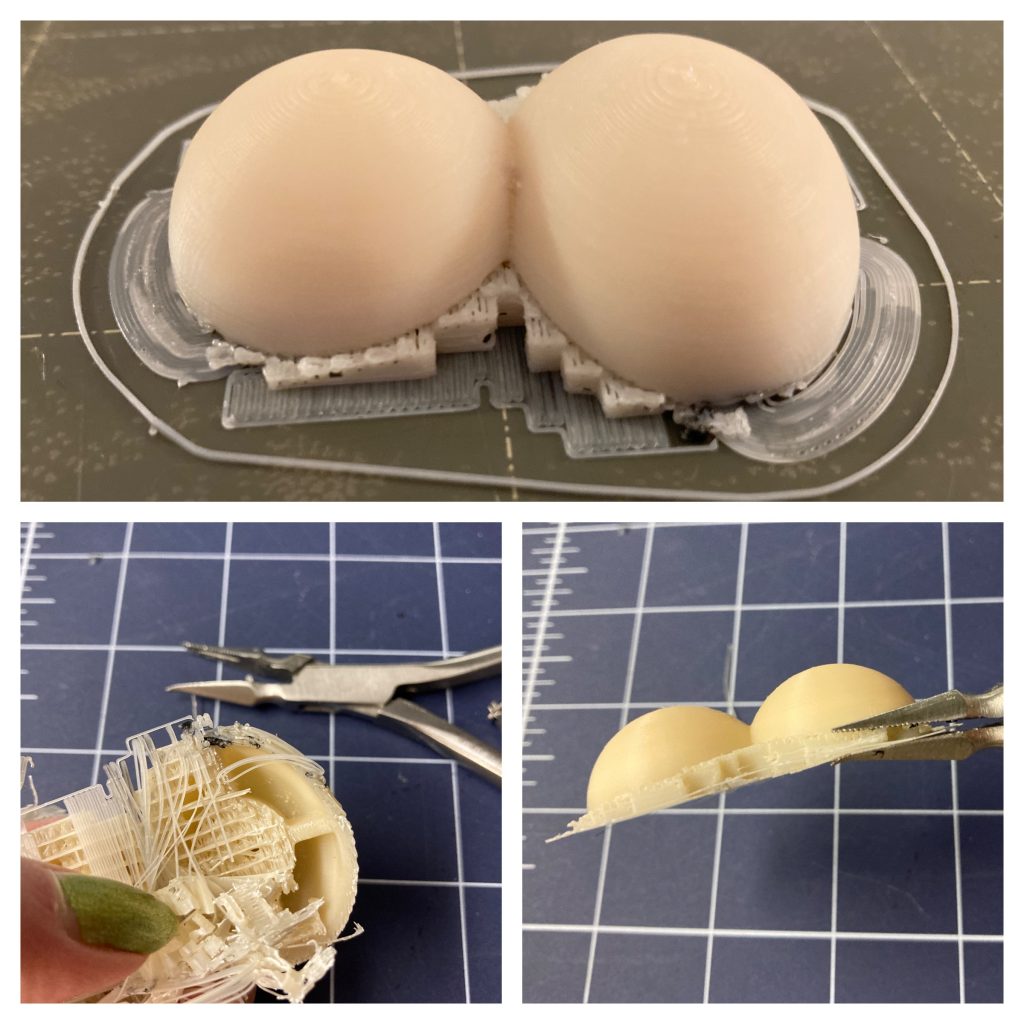 Removing support material
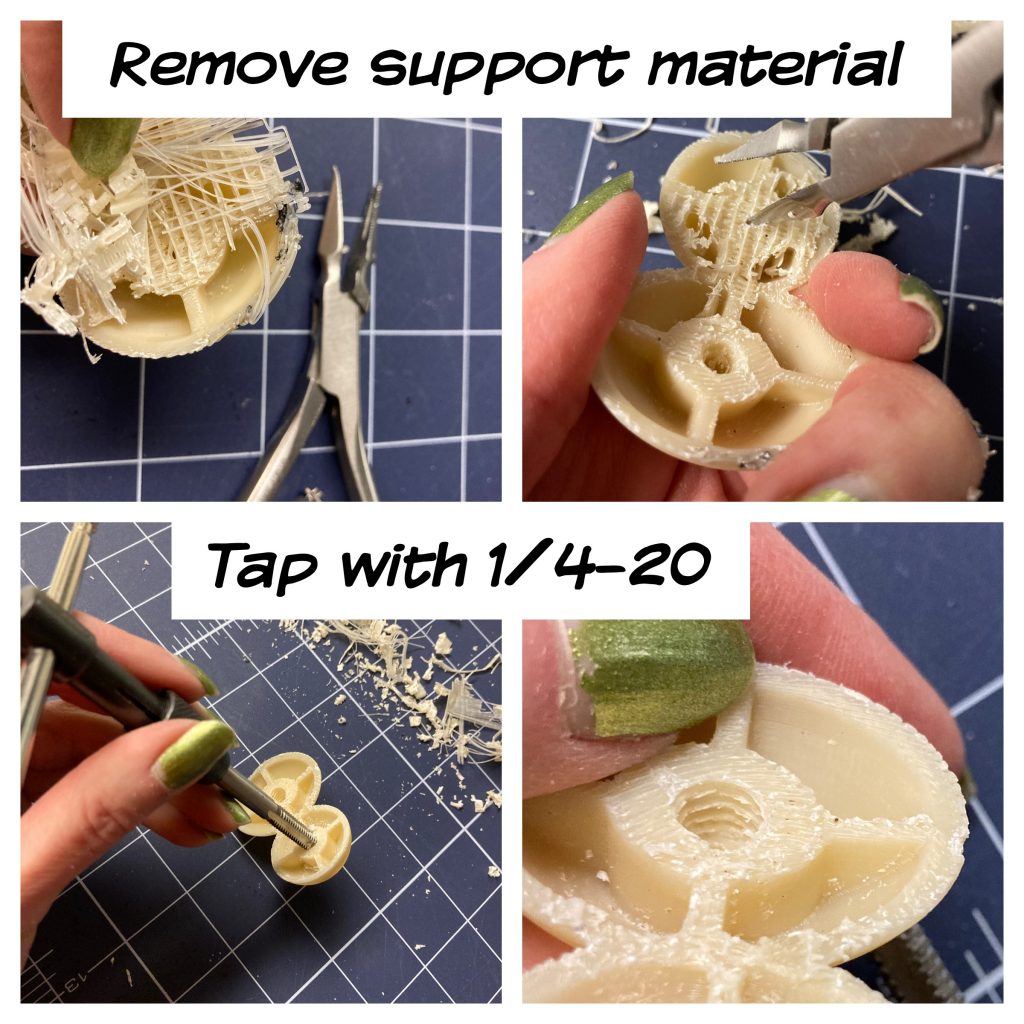
I printed these eyes in ABS with supports on the build plate to support the concave back as it prints. The finished part has supports underneath that need to be removed. My favorite tool for that job is a splinter forceps. Anything with a fine tip that grabs will do, but this tool has excellent grip force for pulling material from tiny spots. Amazon carries a cheap version here:
The tips on the Amazon version bend over time because it’s a cheap tool, so I’ve since upgraded to the MicroMark version which is higher quality. You can find that here:
https://www.micromark.com/Surgeons-Splinter-Forceps
The MicroMark version would make a lovely gift for Christmas. The Amazon version will work in the meantime if cash is tight. You can also try tweezers or pliers to remove the support material.
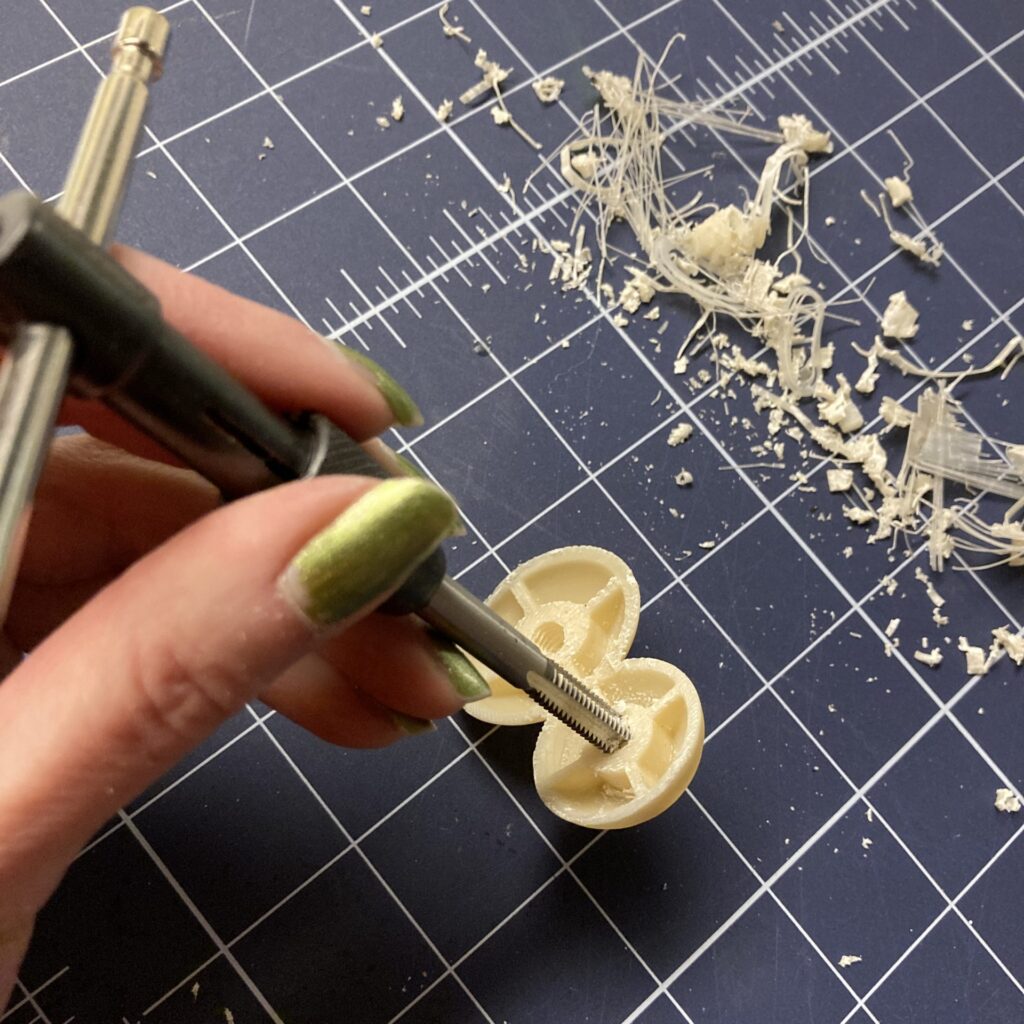
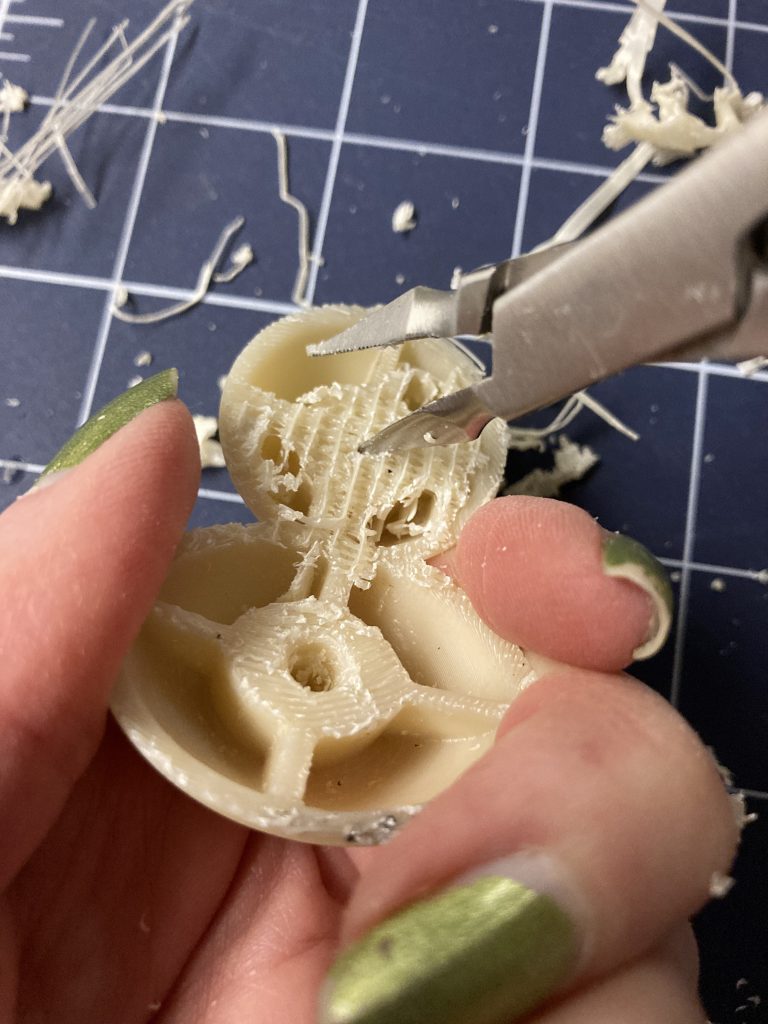 Be sure to remove the support material from the two holes in the back. Use a long straight pin to jog supports loose and then remove it with your pliers, tweezers, or forceps. Once this hole is clear, you can tap it with a 1/4″-20 tap so that it will be able to receive the 1/4-20 nylon bolt it was designed to receive. A suggested supplier and size for these bolts is listed in the pattern directions. Use care when tapping. If you tap too deep, you will blow out the front of the eye, so take off your earbuds and listen and feel for when you reach the end of the hole. You may need to go in and out more than once, brushing off the tap threads with an old toothbrush as you proceed to get a clean tap.
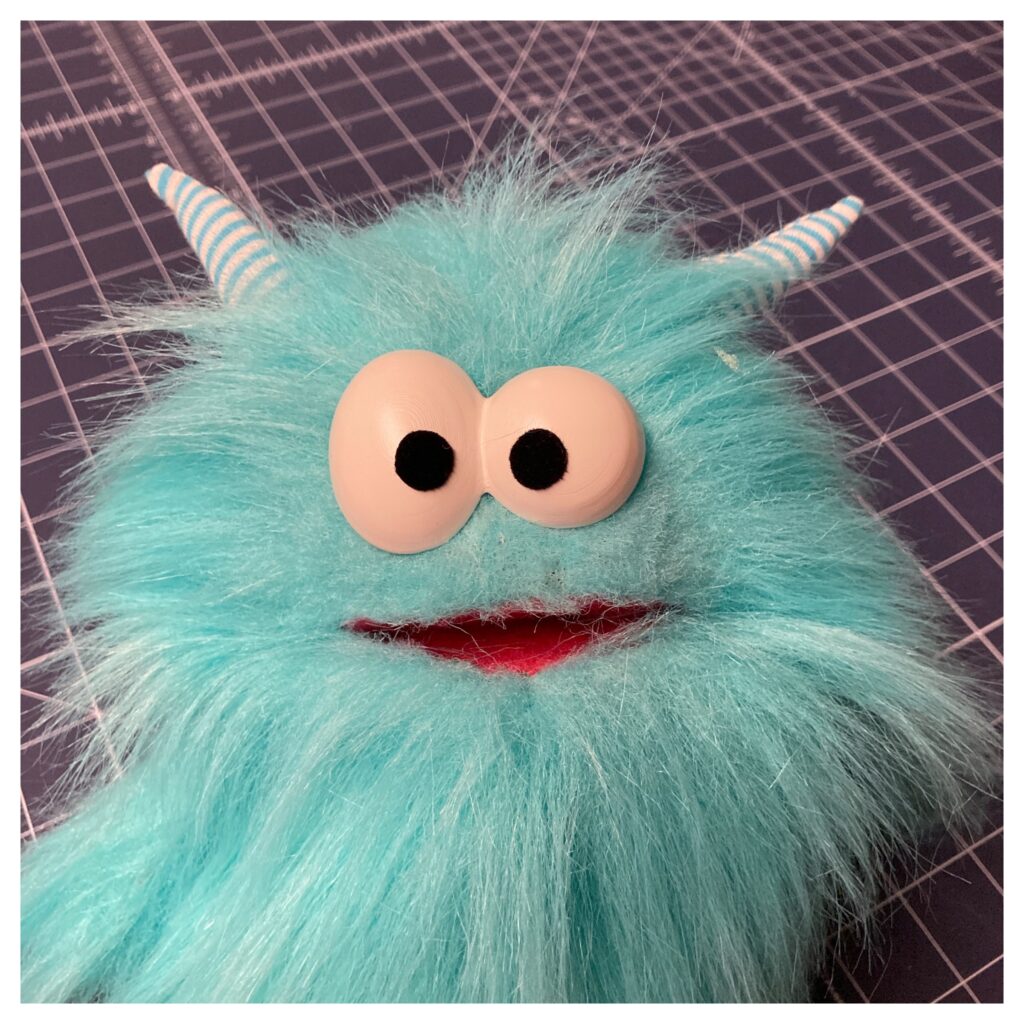
Finishing your 3D Print
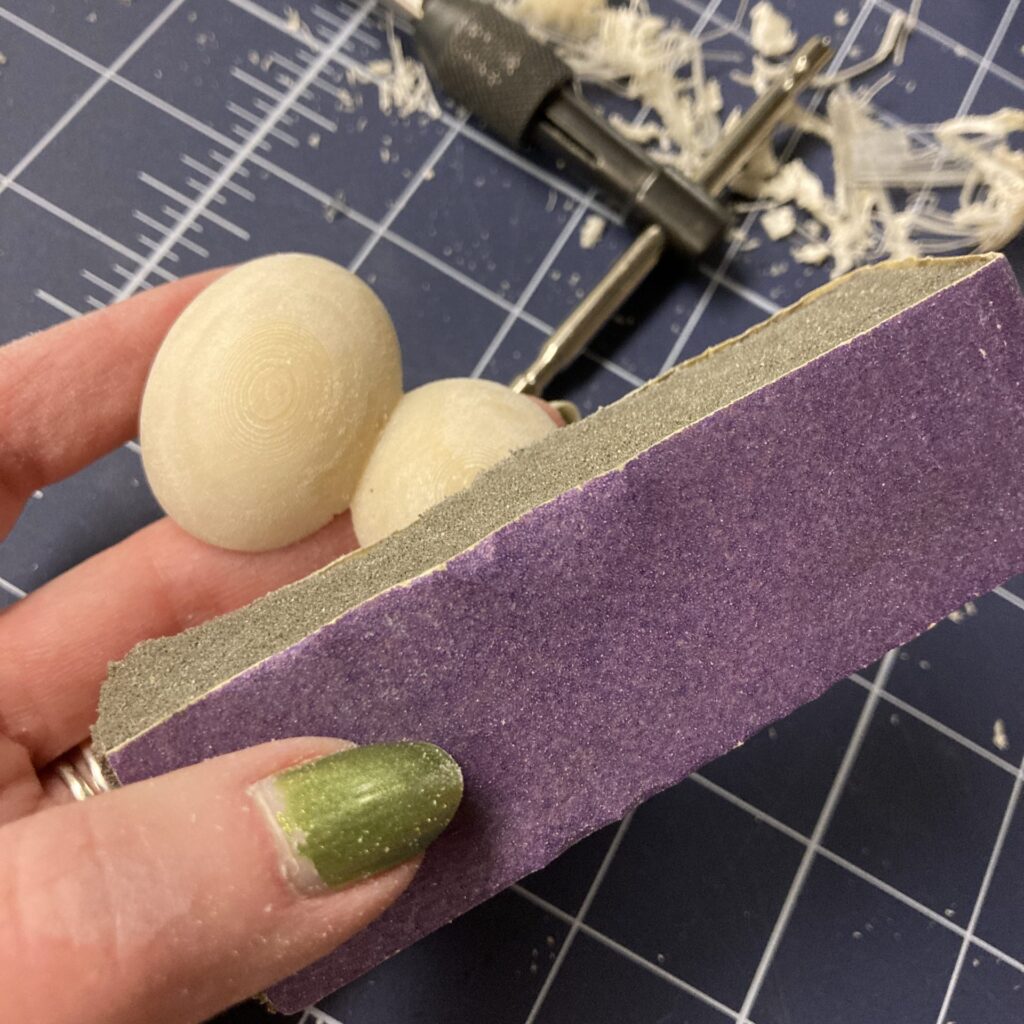
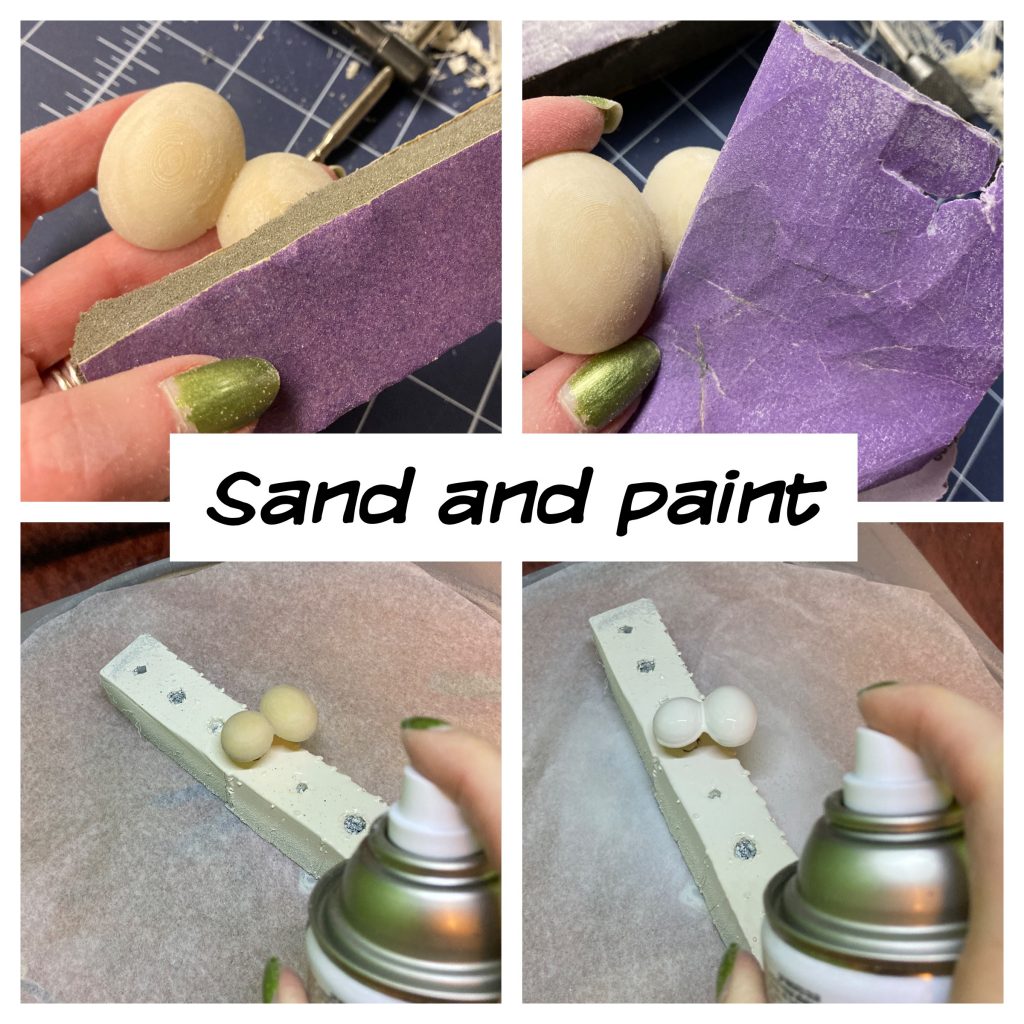
Once the supports are off and the hole is tapped, you will need to finish the front surface by sanding it smooth. Then it will be ready for paint.
When I first started building, I put commercial puppet eyes on my puppets without sanding and painting. The final results are more professional with a sanded and painted eye.
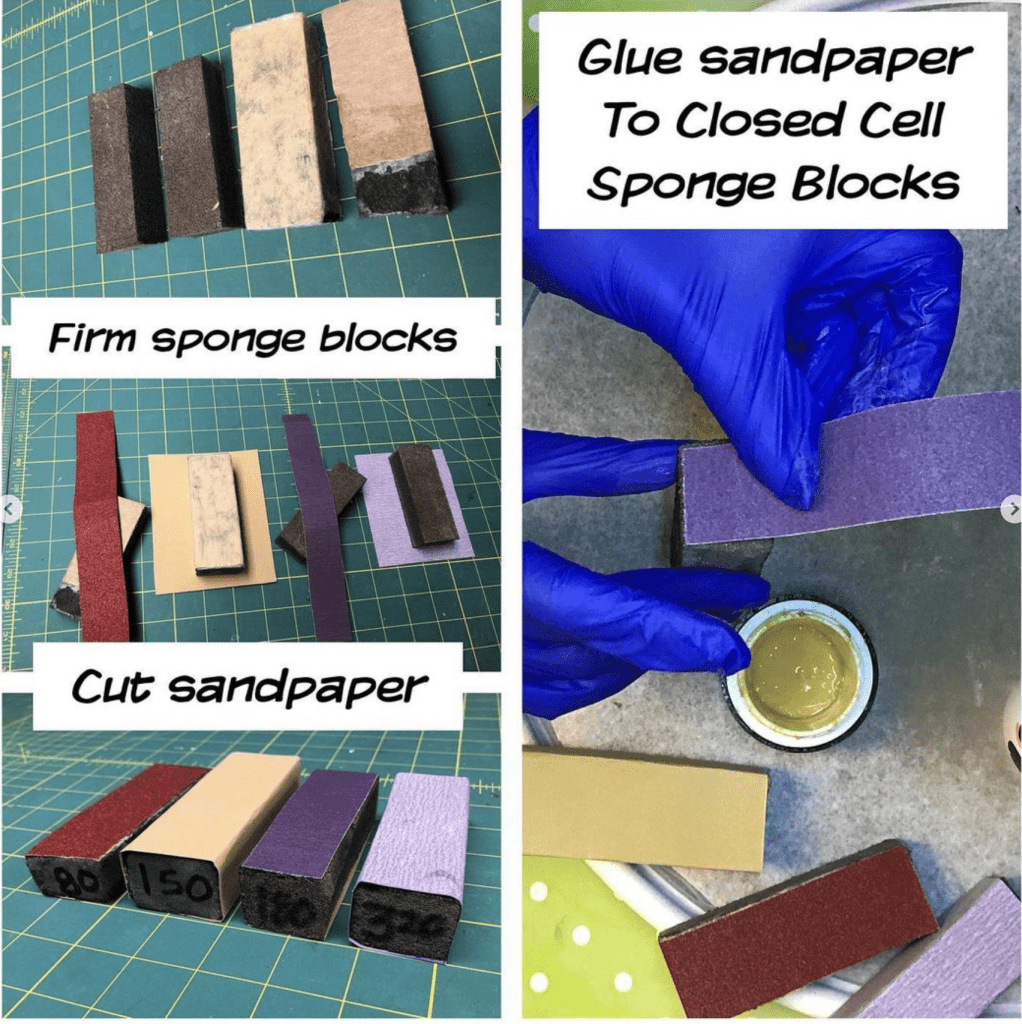
I sand my eyes with homemade sanding sponges modeled after manicure sponges. The size is easy to grip and manipulate. Sanding sponges are also available at hardware stores. For homemade ones, I used a firm closed-cell foam and glued various grits of sandpaper to the outside using contact cement.
I generally use 180 grit to sand until smooth. The flexible sanding sponges allow me to sand contours, edges, and cracks more easily. Once the front and edges are smooth, spray with matte white spray paint. My favorite quick-dry brand is listed in the directions. Follow with a matte or satin clear coat. Be sure to use spray paint in a well-ventilated area.
I have a spray booth now, but I used to spray paint inside a piece of old vintage luggage to catch the overspray and prevent the wind from blowing debris onto my piece when spray painting outside. I also have a variety of painting stands to hold my piece in place so the edges of the piece don’t stick to the surface the piece is resting on. In this case, I have the nylon screw inserted in the eye and the hex end is shoved into a closed cell foam chunk with slots cut into it. This suspends the eye for better painting (see photo). The foam chunk is resting on a small plastic kitchen turntable, so I can rotate the piece while I spray.

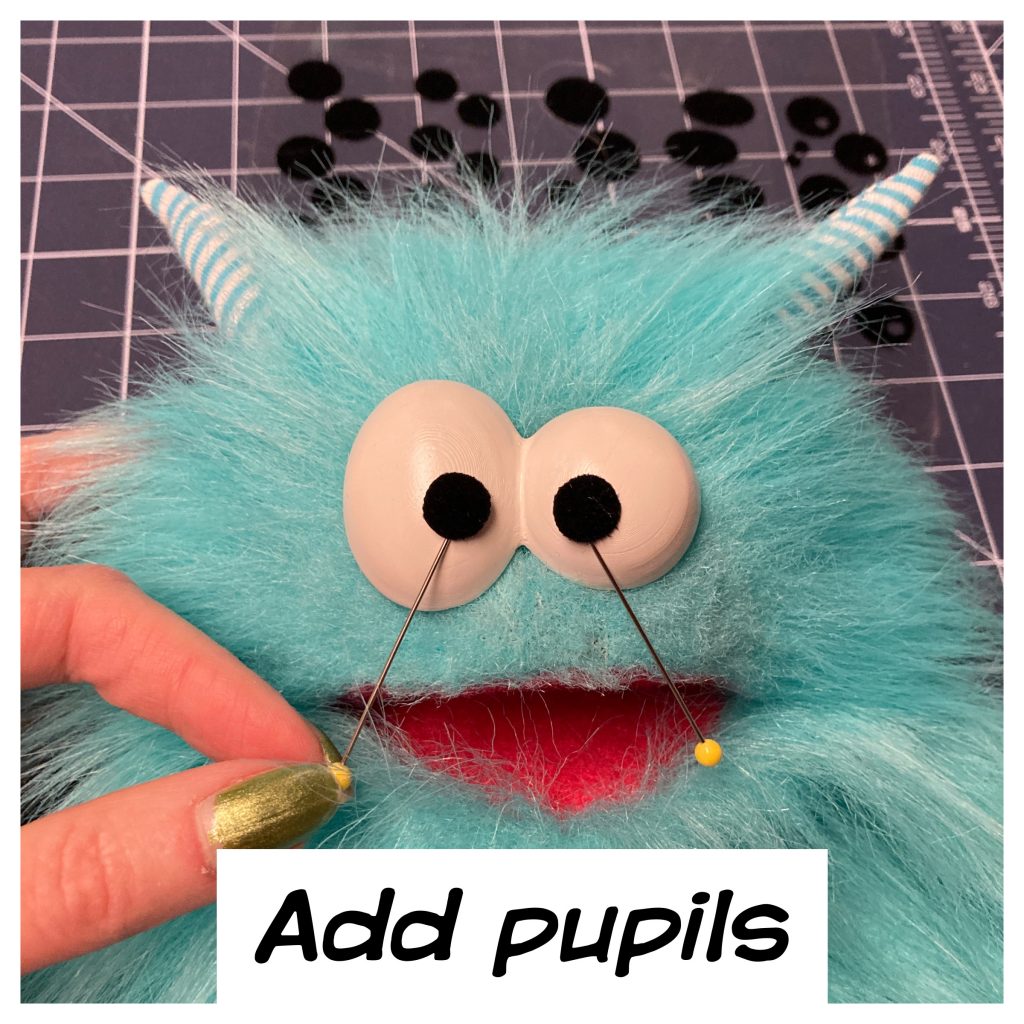
If there are still visible print lines after the first or second coat, then you didn’t sand enough. You can still sand once the paint is fully dry and then redcoat with new paint. Finish with a clear coat spray sealer in matte or satin allowing it to dry overnight before handling. To add pupils, add the wonky eye to the puppet FIRST. Once the eyes are on, add pupils to the puppet using the end of a straight pin so you can adjust if needed before pushing them down permanently. I cut these small pupils using a cutting machine for accuracy, but any punch that can handle self-adhesive velvet will also work.
Happy Building! I’d love to see your finished puppet. Email me at pam@lapuppets.com with a photo.