Discover the Unique Benefits of 3D Printing Eyes for Your Puppets
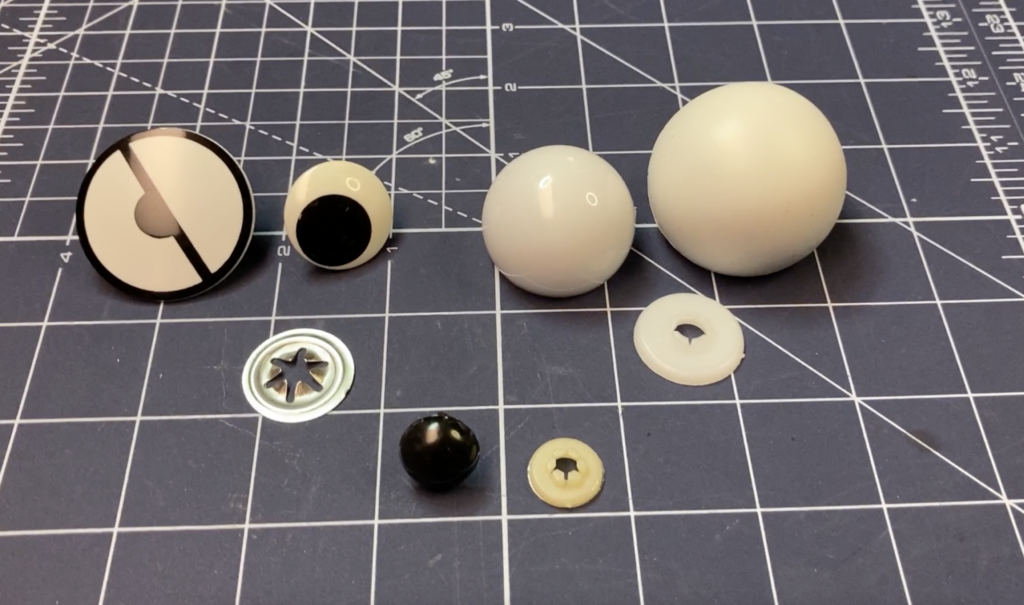
Commerical Eye Options
There are lots of options for eyes for your puppet characters. I’ve used many over the years. In the 1980’s when I started building puppets, the internet didn’t exist. I purchased local craft supplies including shank-style buttons or small wooden half eggs or any safety eyes I could find at a craft shop.
With the advent of the internet came online shopping. Muppet-style half-dome safety eyes were available along with a greater variety of toy safety eyes. This is a wonderful substitute for the ping pong balls I used to cut in half. Even with the broader offerings on the internet, that variety is eclipsed by the potential of what can be 3D printed. 3D printing allows for limitless scale and variety in shape.
The Perk of 3D Printing
If you can’t afford a 3D printer, just keep this idea in the back of your mind until you can. You can save up slowly if needed. I’ll admit that focusing on good character design and solid build skills is more important for beginners. But, if you have been building for a while and want to “up” your puppet-building game, then 3D printing will give you the design flex to create shapes and sizes outside available offerings. It also allows for a unique attachment option that can be designed into the eye back which can’t be done with custom vacuum forming or resin casting.
3D Printed Half Dome Eye

Dr. Dark
Dr. Dark’s Deep Dark Issues
The Dr. Dark puppet featured in my YouTube video was actually designed to have one eye, but the eye on this older puppet has several issues. I didn’t know much about professional building when I made him, and my kids (now adults) asked that I not throw him away because he was a favorite when they were kids. So Dr. Dark is a regular fixture in my shop despite his flaws. His ping-pong ball eye is glued onto his head. Hot glue was a poor choice long term, but I didn’t know any better. As a budget-conscious stay-at-home mom, it was cheap and readily available. Now, if I ever choose to repair this eye, I’d have to cut it off the fleece. I’ve had to do this before when repairing other puppets, and it’s doable with extreme care, but it can be difficult and leaves scars that must be designed around. This is one reason I don’t repair other people’s puppets anymore. The safety eye (eye on a post) option is an alternative that won’t damage the fleece or fur, but it’s difficult to remove once the back is snapped on. I’ve also had to remove those eyes, and it involves using cutting tools that either snap off the post or destroy the back to free the post. Both methods are difficult and usually require opening the puppet head from the back to gain access to the eye. The 3D-printed eye, if designed with internal threading to receive a nylon screw, can be removed easily without damaging the puppet. This makes adding puppet eyes less stressful as well. Poor placement can be easily fixed. If you are making puppets for children, then the safety eye is best. For puppets used professionally in video and live performances, the safety element isn’t needed therefore a post-style safety eye only makes repair and replacement complicated.
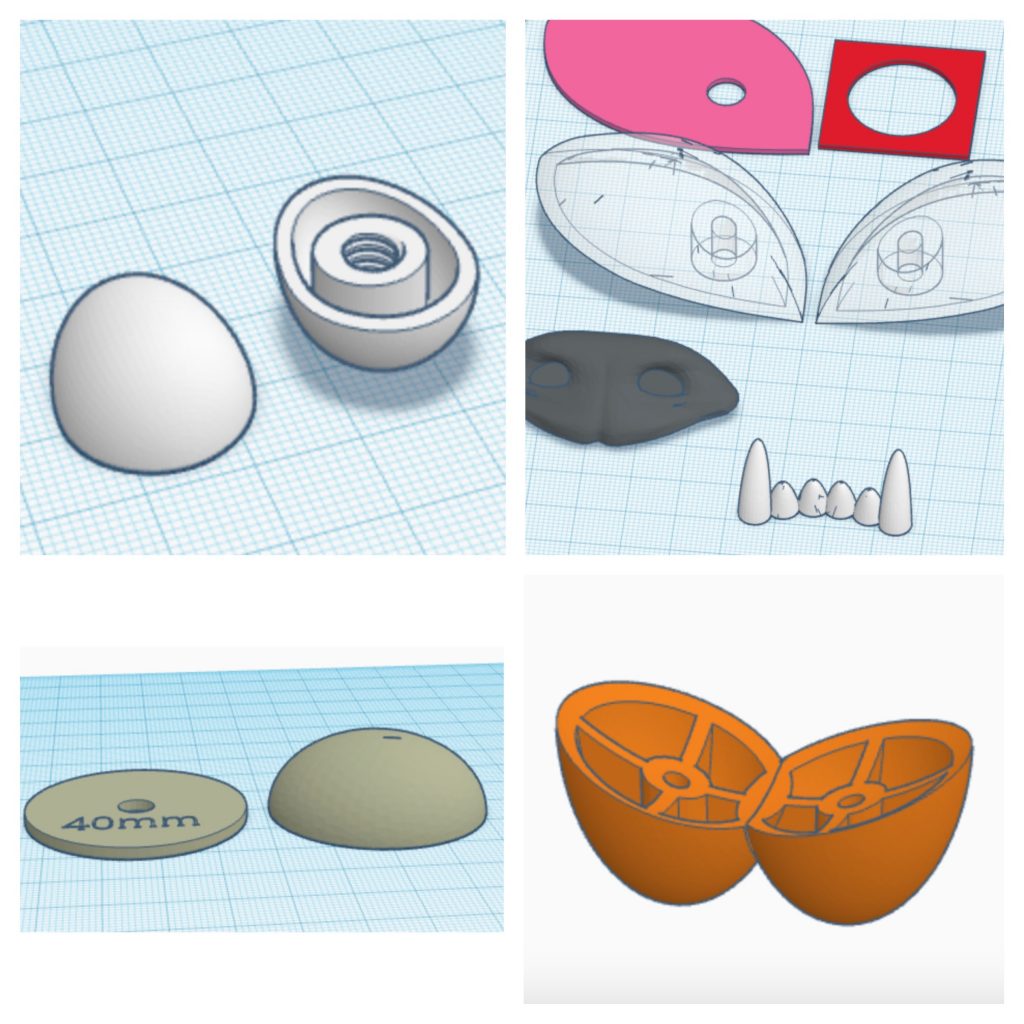
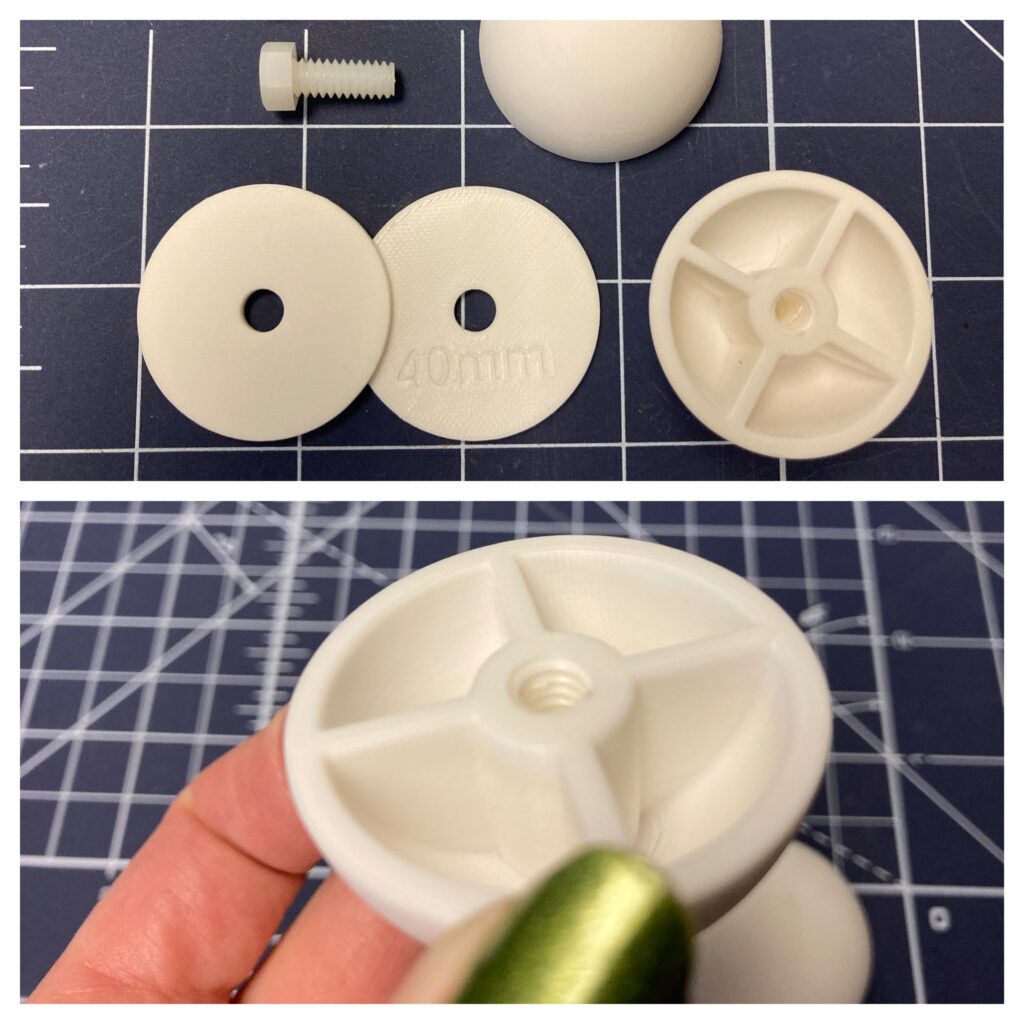
The Genius Attachment Method
As you can see in the 3D-printed eye dome above, the threads are inside the eye, so a lightweight, commercial nylon screw can be used to secure the eye to the head. The 40mm plastic washers to assist the screw are printed as well. The washer can be easily designed when the eye is designed. I learned how to design 3D-printed eyes from Pasha Romanowski of Project Puppet. He has an online class to teach this skill using Tinkercad. Tinkercad is a free, easy-to-use 3D modeling software. You can design the eye in Tinkercad, export the eye model as a .stl file, and then open the .stl file in your slicer for 3D printing. Contact Pasha at www.projectpuppet.com using his contact form to ask about the class.
Not Just for Eyes
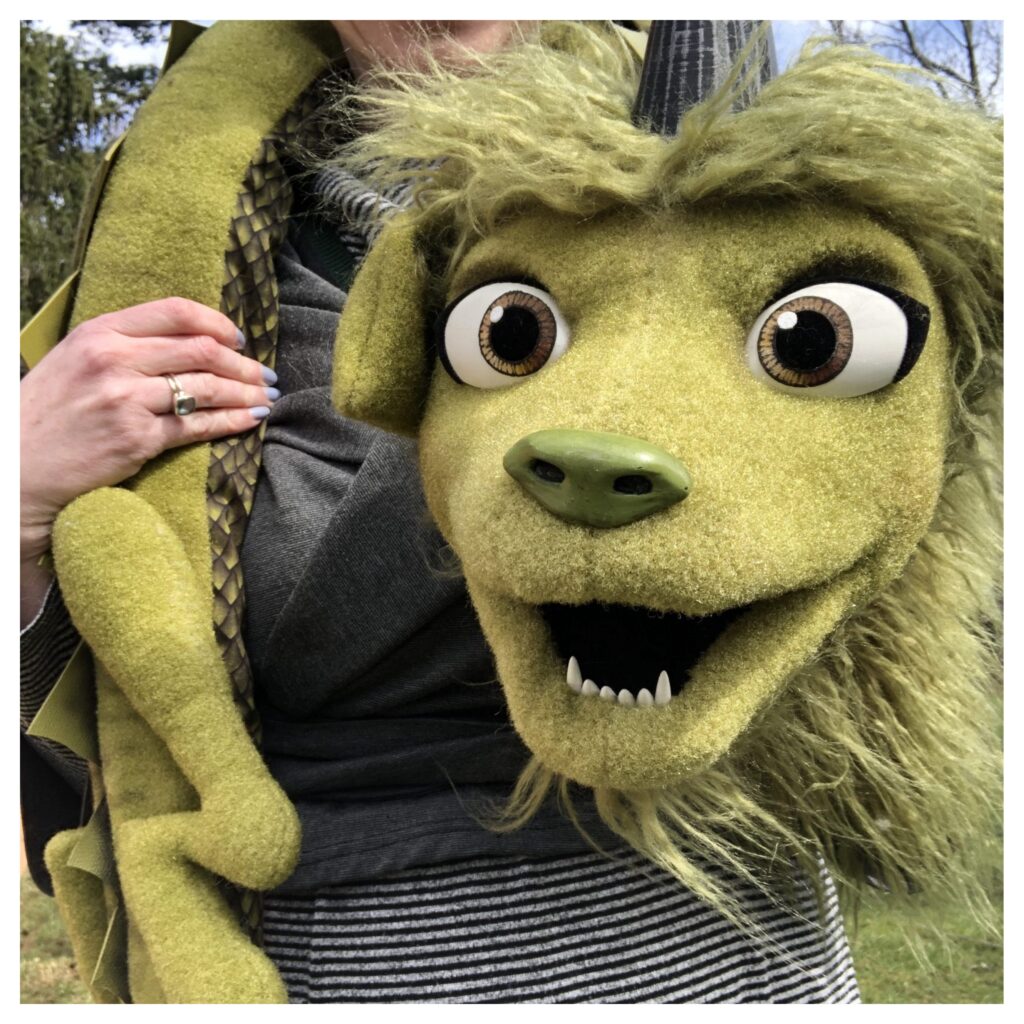
You can also design teeth, noses, and hardware to use in your puppet. My green dragon has 3D printed teeth, horns, eyes and nose.
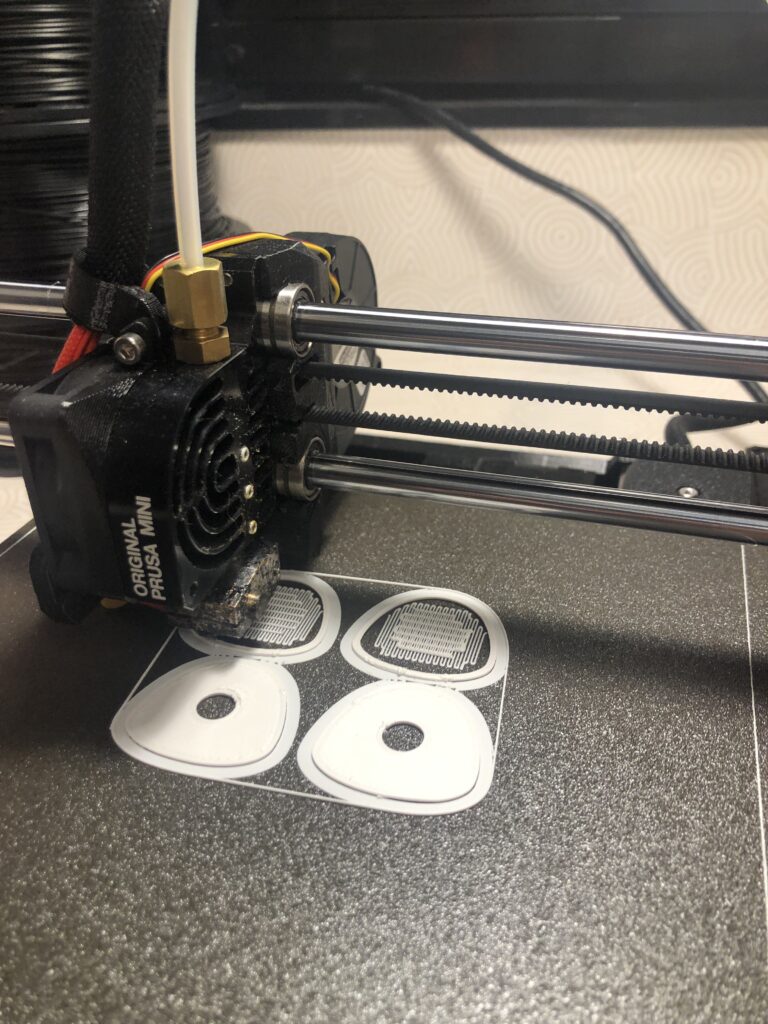
The Prusa Mini
I have a Prusa mini 3D printer. It costs $460 at the time of this writing. There is a learning curve to using a 3D printer, but the Prusa line is well-supported with plenty of online help. I usually print in ABS and ASA filament (which prints best in an enclosure) and sand my prints prior to painting in several coats of flat white spray paint. I follow that with a clear coat (matte or satin).

Power Sanding Safety
When you sand 3D prints, I suggest wearing a mask to protect your lungs from small plastic dust, especially if using an electric sanding tool. I’ve gone to the doctor twice for lung irritation from sanding 3D prints, so now I take precautions.
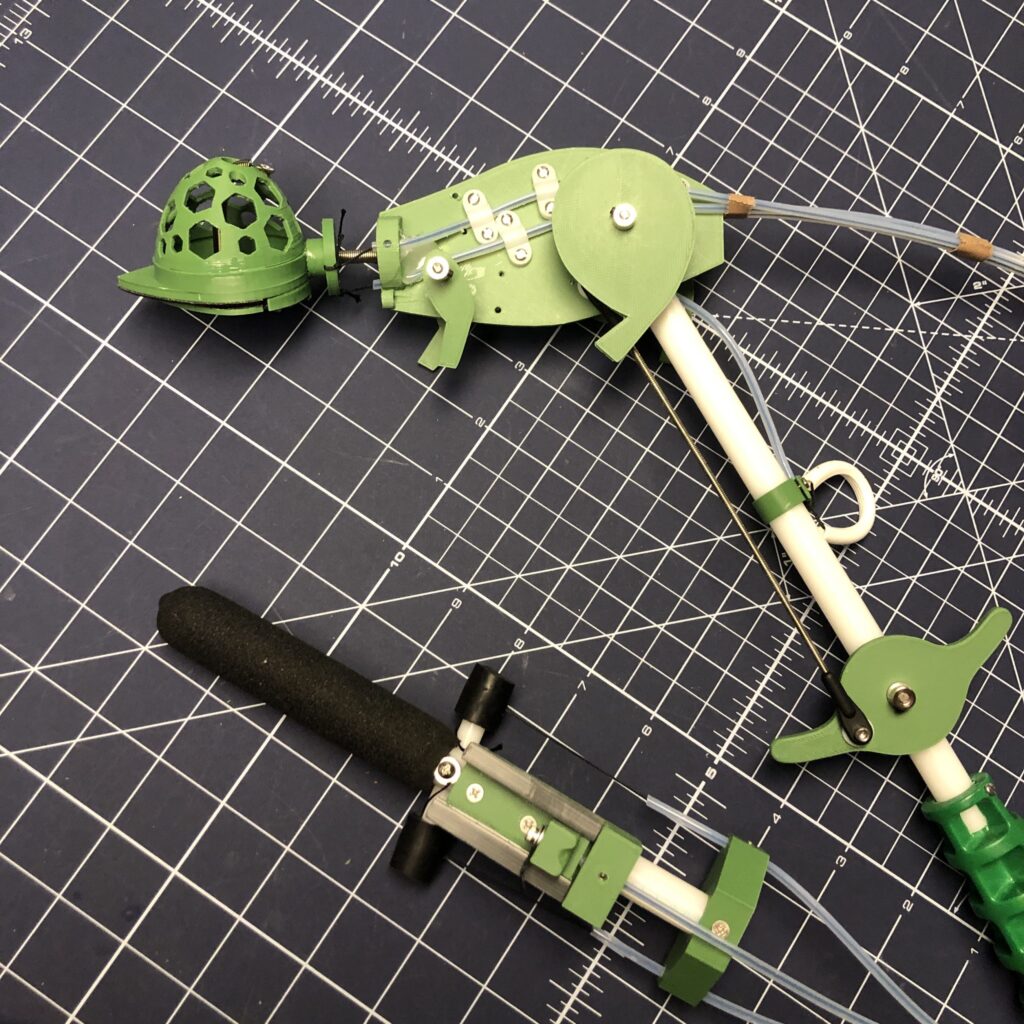

3D Printing for Mech Puppets
I find designing new parts SO much FUN. I love experimenting with new ideas for eye shapes, noses, and internal hardware. After taking Jim Kroupa’s Mech class at the O’Neill Puppetry Conference, 3D printing ended up being a nice substitute for some of the pieces that Jim would hand-cut from ABS sheets.
Puppet Shoes
I’ve also used 3D printing to design shoe bases for little puppet shoes. The resulting shoes are lightweight and can be more cartoon in proportion to better match the look of your character.
My Favorite Tool
I hope you try your hand at this new technology! My 3D printer is one of my favorite tools now. I can sketch characters with any eye shape that best fits their personality knowing I can design it in Tinkercad for printing. Check out this description of Pasha’s class, and make this your next skill to learn! If you already have a 3D printer and want to try printing a 3D printed eye design, my Lil’ Monster Puppet Pattern has access to a .stl file you can use to print a small eye set that is perfectly scaled for that little puppet, which is a fun, quick build.